Star Wars Jedi Survivor – Holotactics guide: How to play, best units, rewards, more
 Respawn Entertainment
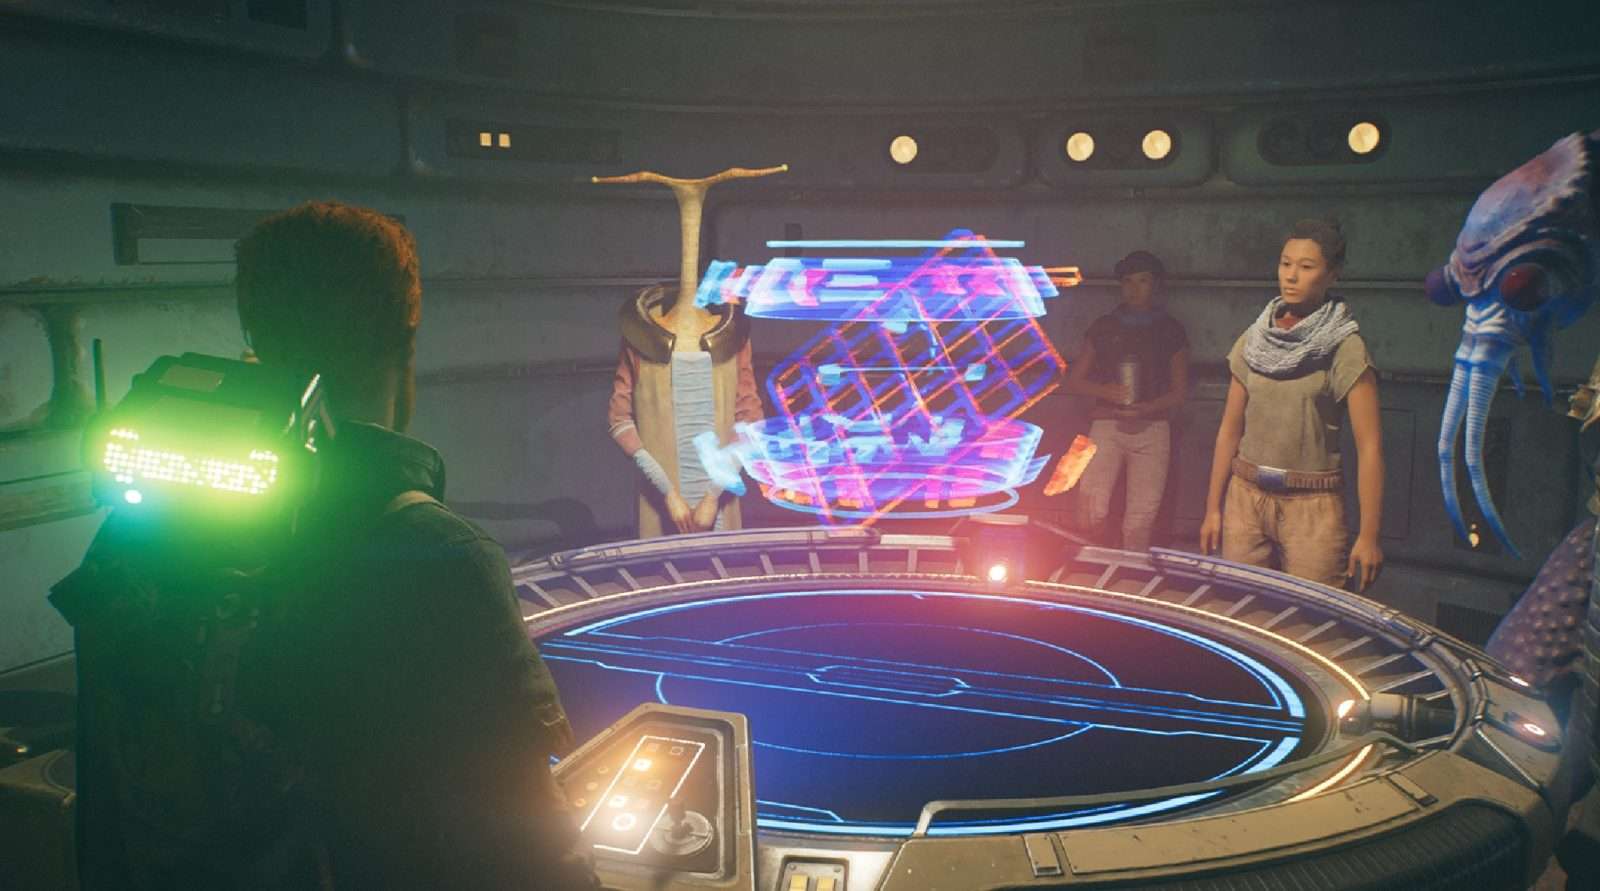
Star Wars Jedi: Survivor provides players with the Holotactics minigame located at Pyloon’s Saloon on Koboh. The strategy-based side quest sees you drafting a team of villainous, AI-controlled units to take down an opponent. Here’s all you need to know about Holotactics.
On the upper floor of Pyloon’s Saloon, a Holotactics table is just waiting to be discovered by Cal. After playing through the early hours of Star Wars Jedi: Survivor’s story and finding some new companions to fill out the cantina, the unique minigame becomes available for the rest of the adventure.
At its core, Holotactics is all about strategy. Picking the right units, placing them in the optimal starting positions, and watching as the AI, hopefully, works its magic. But there’s plenty more to it than first meets the eye in the game.
From the best units to the rewards on offer, here’s an overview of Holotactics.
Contents
 Respawn Entertainment
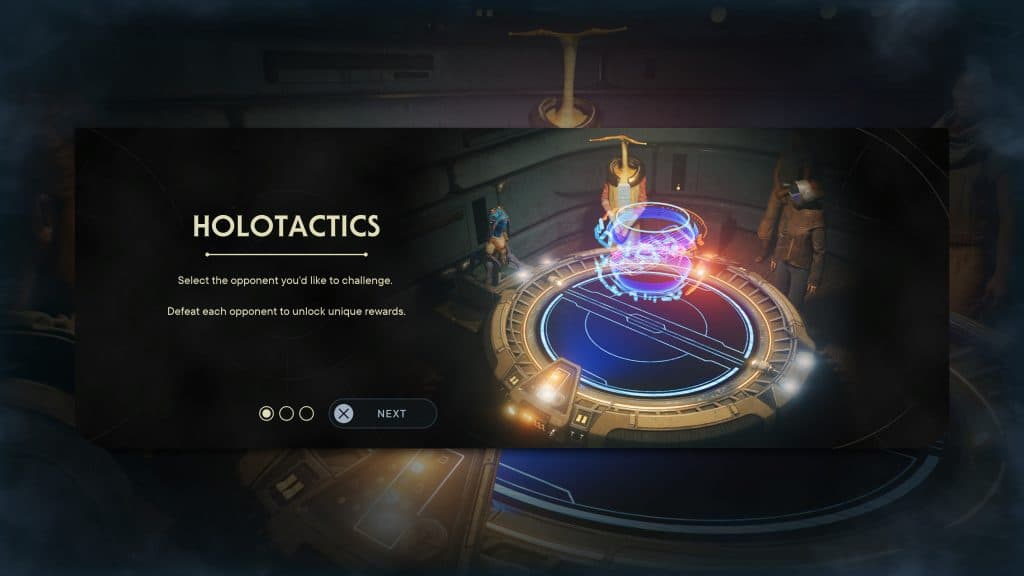
Holotactics rules explained in Star Wars Jedi Survivor
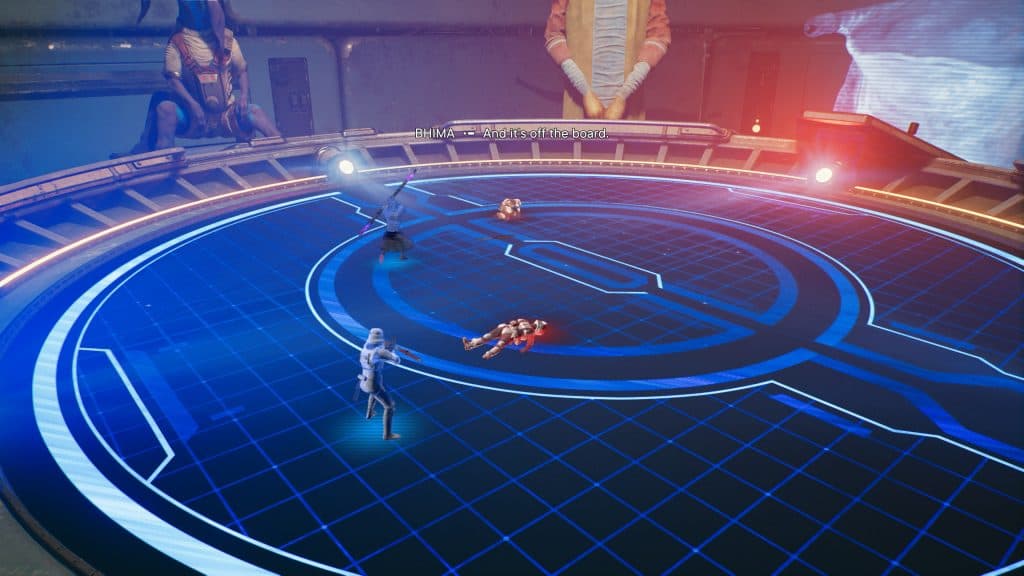
Starting each round of Holotactics in Star Wars Jedi: Survivor, you’re given a set allocation of points. These points can then be used to draft various AI-controlled units on your side of the board. The goal being to have your units win in a fight to the death with your opponent’s AI-controlled units.
When it comes to upgrading your arsenal and adding more units to the list, this is done outside of the Holotactics board. By defeating enemies out in the world, then having BD-1 scan them, Cal can then call upon these foes in the minigame. Thus, the bigger and more challenging an enemy you take on in the game, the bigger and more imposing unit you’ll be able to command in Holotactics.
Each game takes place over multiple rounds, varying from just two rounds on the easier side, up to four rounds on the harder side. In order to come out victorious, you have to win all rounds in a row. Fail at any point and it’s back to the beginning.
As a nifty bonus, however, Cal is able to hoard points between rounds, should you so choose. If your strategy is on point, you can intentionally save some of your points in a certain round. In doing so, they’ll be carried over to the next round, giving you more power to play with when the stakes are higher.
All Holotactics opponents and rewards in Star Wars Jedi Survivor
As you progress through Star Wars Jedi: Survivor and explore the many vast open locations on offer, you’ll meet many new NPCs that can be recruited back to Pyloon’s Saloon. Some of these recruits turn into new opponents at the Holotactics board, while others are familiar faces you’re already in touch with.
Each offers their own reward so knocking them all down one by one is certainly worth your while. Below is a full look at every Holotactics opponent and the rewards they provide:
- Turgle – Priorite Shard
- Greez – Clothing Item (Jacket)
- Tulakt – Material
- Merrin – Jedi Scroll
- Caij – Bounty Chip
- Skoova – Facial Hair
- T-1N8 – Datadisc
- Tulli – Skill Point
Best Holotactics units in Star Wars Jedi Survivor
Knowing which units to play in various situations is vital to your success in Holotactics. However, not even the best-laid plans are foolproof. As Star Wars Jedi: Survivor’s minigame is ultimately controlled by AI, things are always down to chance. While one strategy may work five times in a row and seem flawless, there’s always the possibility of it failing the sixth time around.
So with that in mind, our suggestions are selected based on units that came in handy more often than not while defeating every opponent at the Holotactics board.
 Respawn Entertainment
Roller Mine
Starting things off, the Roller Mine is an incredibly effective tool against bigger targets. In the blink of an eye, they can dash across the board, explode, and if all goes well, obliterate a huge target in one fell swoop. If you’re relying on them though, it’s worth avoiding any melee units for the round. Stick to ranged units so they can stand back and keep away from the detonation.
Droideka
Next comes one of the strongest ranged units of them all, the iconic Droideka. These units are incredible at keeping their distance and laying down massive bursts of fire. With shields to protect them from return attacks, they’re almost unstoppable if you have a numbers advantage.
Magnaguard
Last but not least, for a solid, reliable melee unit, we often stuck with the Magnaguard. At a relatively cheaper price of just eight points, this unit is incredibly strong and quite tanky for the cost. With multiple of these on the board, it could be an easy win against just about any opposition.
You should now be a Holotactics expert. If you’re chasing all the Star Wars Jedi: Survivor knowledge imaginable, we have more guides right here:
How gardening works in Star Wars Jedi: Survivor | All lightsaber colors in Star Wars Jedi: Survivor | How to open the door to Vashtan Wolfe in Star Wars Jedi: Survivor | How to increase health & force in Star Wars Jedi: Survivor | How to disable fall damage in Star Wars Jedi: Survivor | Star Wars Jedi Survivor: How to beat Rancor | What does the Mysterious Key do in Star Wars Jedi: Survivor? | How to get a red lightsaber in Star Wars Jedi: Survivor | Fastest ways to earn XP in Star Wars Jedi: Survivor | Where to find Priorite Shards in Star Wars Jedi