I tried modding the Steam Deck & almost lost my sanity
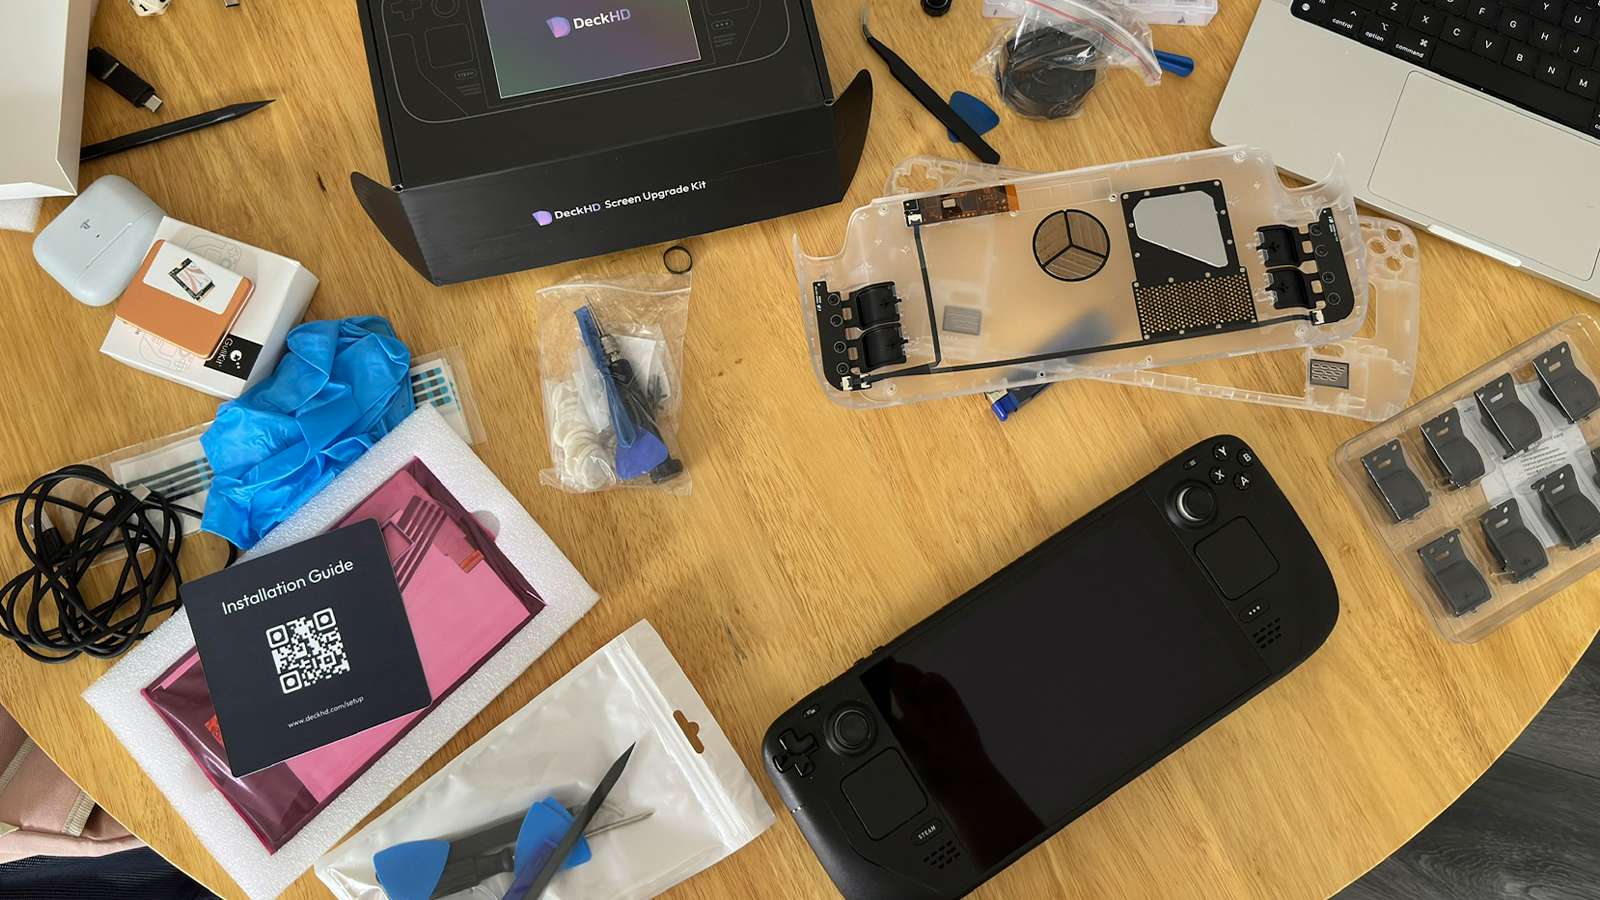
I modded my beloved Steam Deck, featuring all manner of upgrades, including a sharper screen, RGB shell, and a much beefier SSD. But, I should have listened to Valve’s warnings.
The Steam Deck upgrade process is fairly easy if you stick to the basics. Upgrading your SSD, or slotting in a new microSD card. Modding the Steam Deck’s software is also relatively easy, so long as you know where to look.
So why did I think a full shell, SSD, screen, and stick replacement was necessary? Well, I scratched my poor Steam Deck’s screen. My 256GB Steam Deck had a nasty puppy-sized scratch down it, as the now 16KG, 6-month angel collided with it at speed.
So, despite my best efforts, here’s a tale of why you should listen to Valve’s original advice and avoid cracking open the Steam Deck.
Also, it’s a cautionary tale of exactly why you should upgrade the Steam Deck or at least seek out a decent service that does it for you, such as the options that Megamodz offers.
Steam Deck modding is flourishing
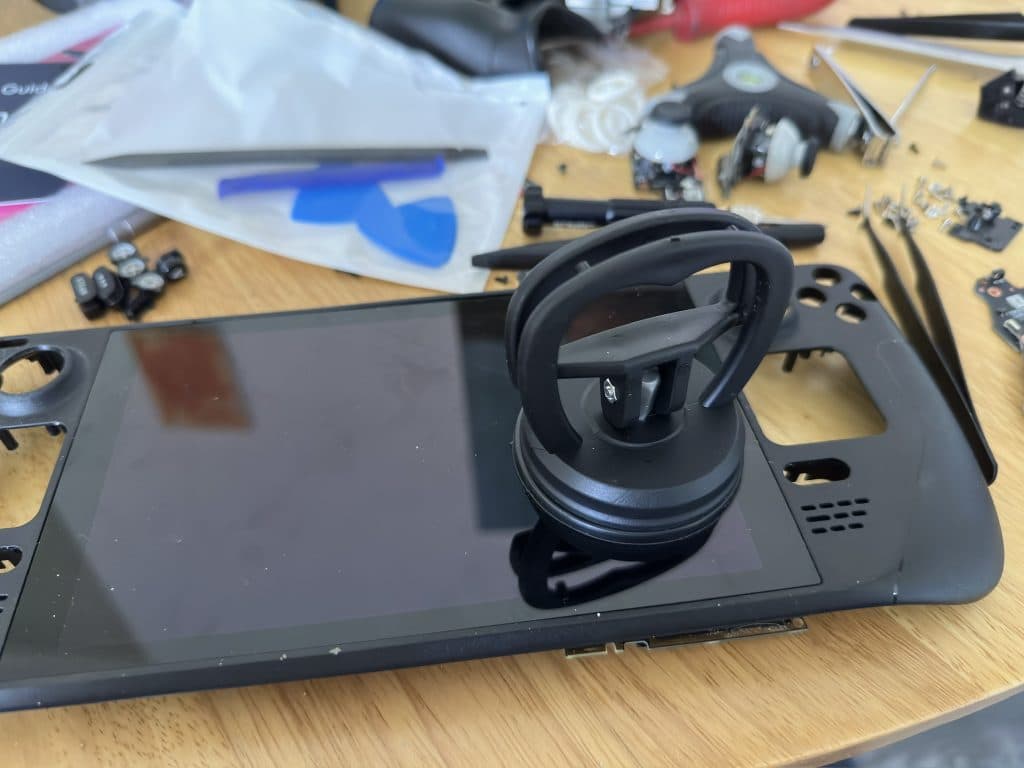
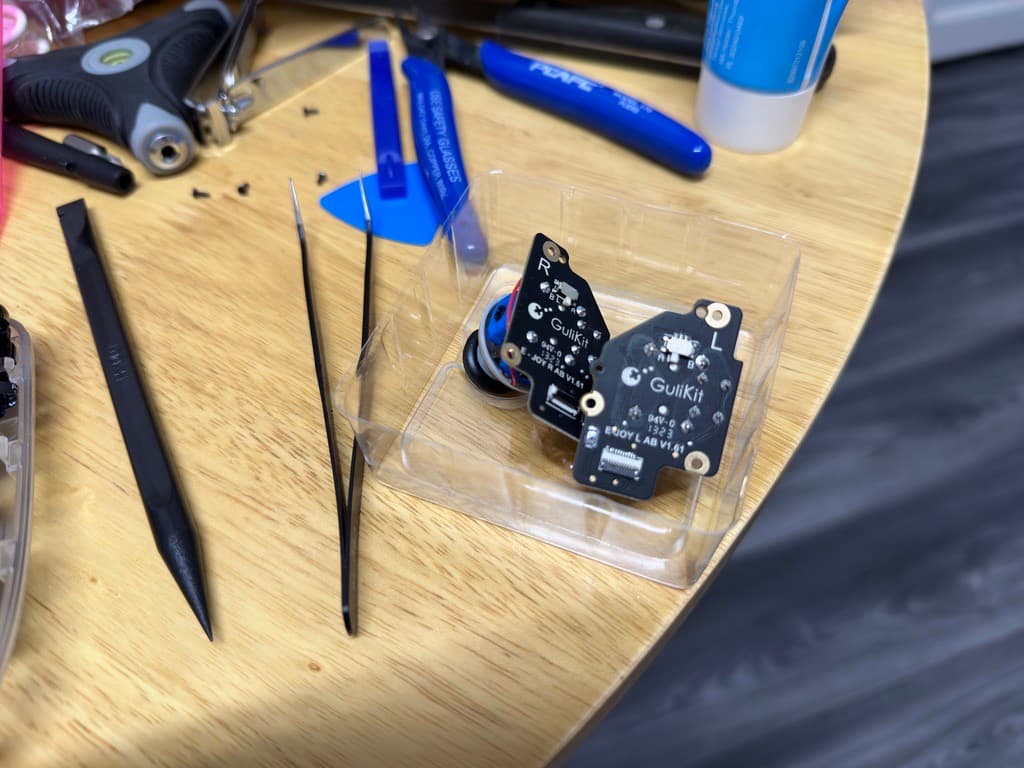 The least of your concerns, the Gulikit Sticks slot straight in
Handheld PCs and single-board computers are without a doubt my current favorite type of tech. Have you seen how much horsepower these things are managing to get out in a format that lets us play on the toilet?
Between the Steam Deck’s recent 3.5 OS update unlocking even more power onboard and every ounce of competition on the market, there’s never been a better time to be interested in these small handheld PCs. It’s still novel that we played through the new Resident Evil 4 Remake on the Steam Deck.
However, the system was from the very beginning eyed up by modders and accessory makers. At first, it was cute, having little add-ons to attach the Steam Deck to a variety of other gadgets. Plenty of docks and eventually, cases. I’m not just talking over-the-hardware skins, but full shell replacements, too.
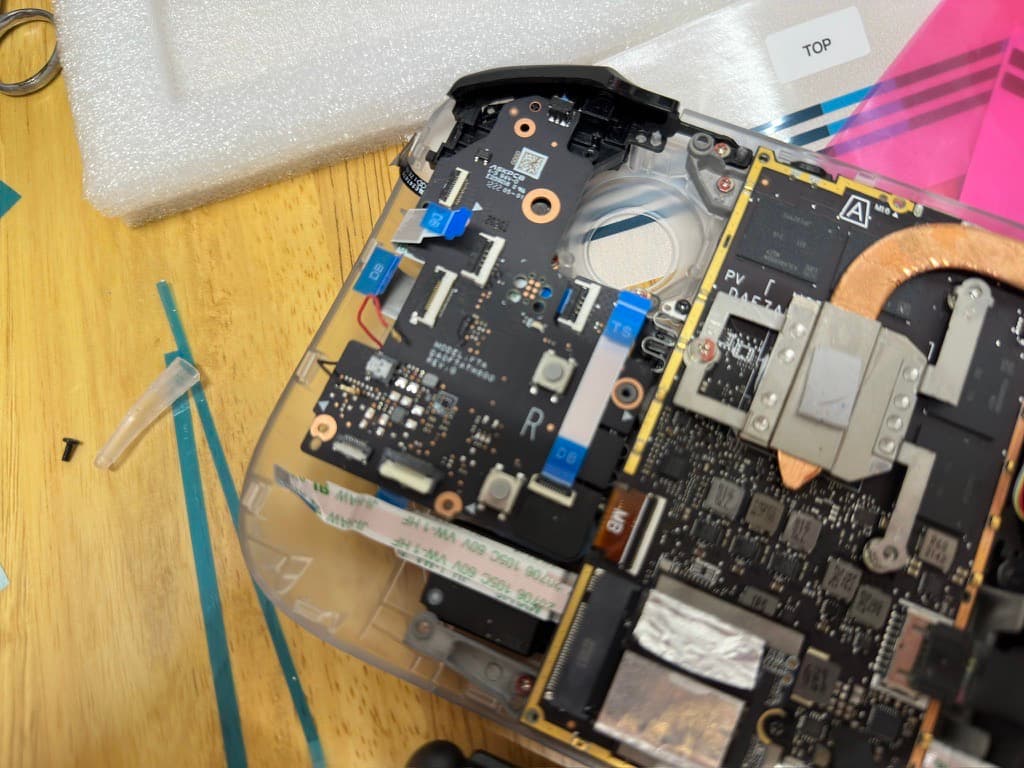
Stripped screws
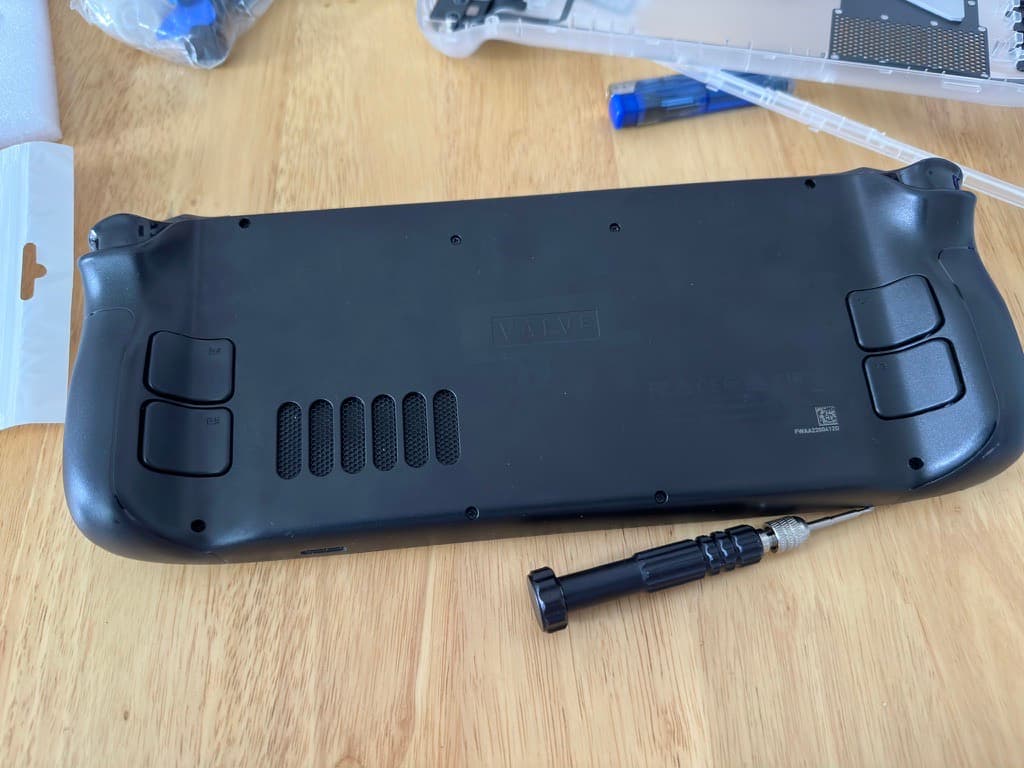
It’s here that I began to hit issues. The Steam Deck is notorious for having stripped screws. The tiny Philips head screws are super easy to get out when they’re cooperating. As Valve didn’t intend for the system to be reopened by my filthy peasant hands, it’s understandable that the best bits of metal weren’t used.
I ran into four stripped screws in some parts. One on the back, and three inside the system. Without a kit on us, and time not really on my side, I soldiered on. Don’t do this. Seek out a tiny flathead or get a stripped screw removal kit. If you run into a stripped screw, do not continue to try to open the Steam Deck. Don’t try removing things from the internals either.
Four screws weren’t enough to break the Steam Deck though. No, this is down to fidgety wires and an unfortunate mishap as I was dismantling it.
Trackpad trouble

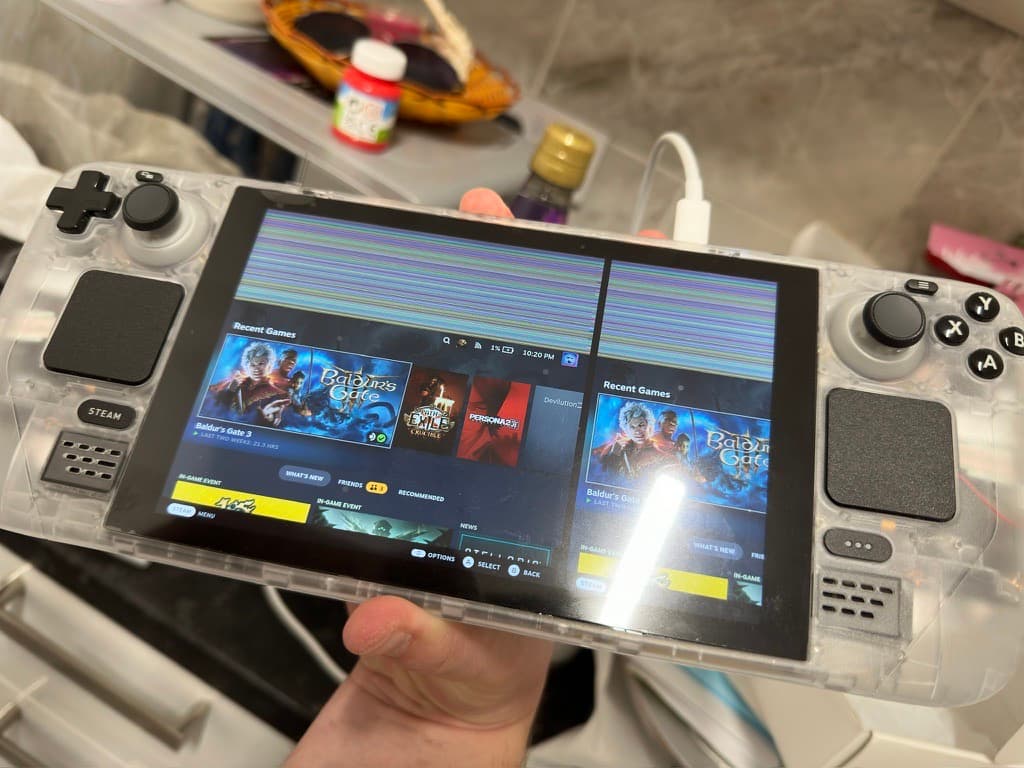
While the system works as intended, working my way from the back to the front caused the trackpad connectors within my Steam Deck to get damaged. These are super fiddly, and I discovered that even the most microscopic damage will cause them to malfunction.
When trying to get them out, remove them with the white housing. It essentially flips upwards but requires an odd amount of pressure to get it removed. It’s also the only part that iFixit doesn’t sell.
No, I’m fine, honestly. Goodbye trackpad. It was nice knowing you.
JSAUX RGB and clear case brings new life to the Steam Deck

You’ll also want to be using a plectrum or other plastic instrument through all of this. Thankfully, JSAUX comes through for these projects.
Installing the JSAUX front shell replacement is one of the most tricky installations I have ever performed. The included kit comes with gloves, additional screws and a full tray to put each component come inside. I’m now drowning in plectrums and mini screwdrivers.
Meanwhile, the RGB back shell can also be tricky to install. However, JSAUX provides lengthy video guides to help you through the process. The RGB shell for the Steam Deck is neat.
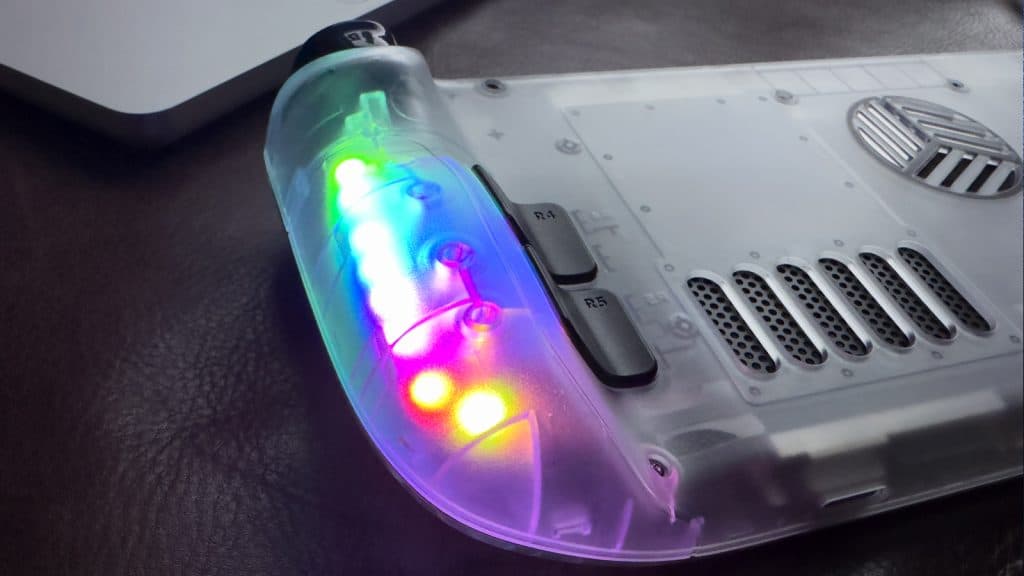
Instead of leeching off the Steam Deck’s battery, it houses its own USB-C port and a button to swap colors or turn it off.
Now, the shells themselves are ridiculously easy to fit – as long as you don’t damage the connecting shells. If you’re only replacing the Steam Deck’s shell, then don’t use a metal knife to run along the edges, this will potentially warp the plastic.
Upgrading to the DeckHD screen on Steam Deck
Once all the components are removed from the inside, I was ready to fit the screen. I went with the newly released DeckHD panel. It upgrades the screen to 1200p and is utterly terrifying to fit.
As I had no use for the old Steam Deck screen, I didn’t mind it getting damaged on the way out. You should bring a hair dryer or heat gun to the mod, as the glue fastened to the original screen is ludicrously strong.
The DeckHD and the JSAUX kit both come with replacement glue strips, so don’t fret about that.
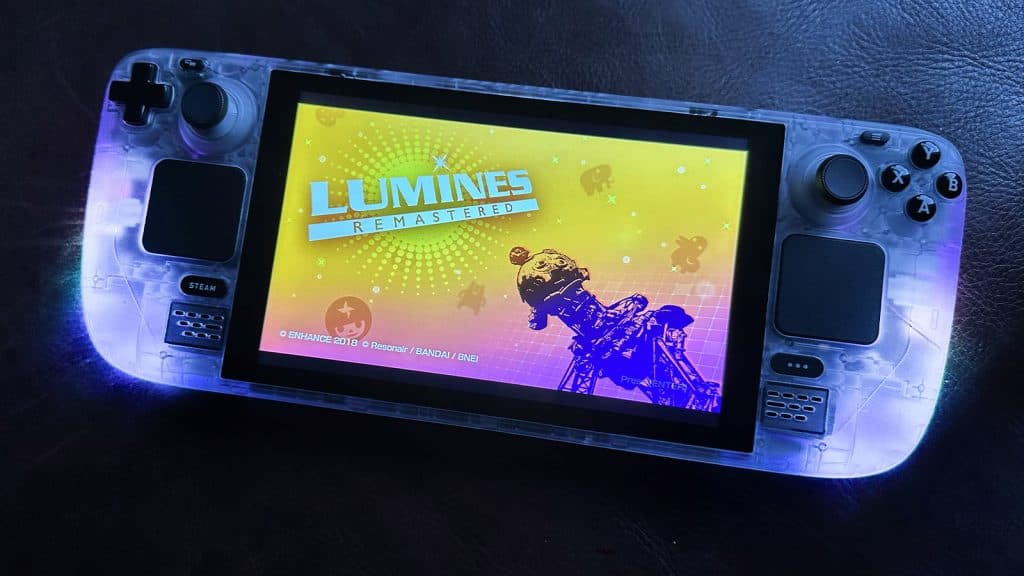
Now, the DeckHD screen is wonderful. The Steam Deck copes quite well with the 1200p screen embedded in it. However, I have noticed that games defaulting to the new native resolution available can run a little worse. September’s most popular title, Baldur’s Gate 3 needed to be reset back to 800p to get it back to a playable state.
It looks stunning & is easy to configure
It’s a vibrant and easy-to-update custom screen that surprised us. DeckHD makes sure to warn you that once you turn it on for the first time, the Steam Deck will look broken. This is fixed with a quick BIOS update and once restarted, I know what I want out of a Steam Deck 2.
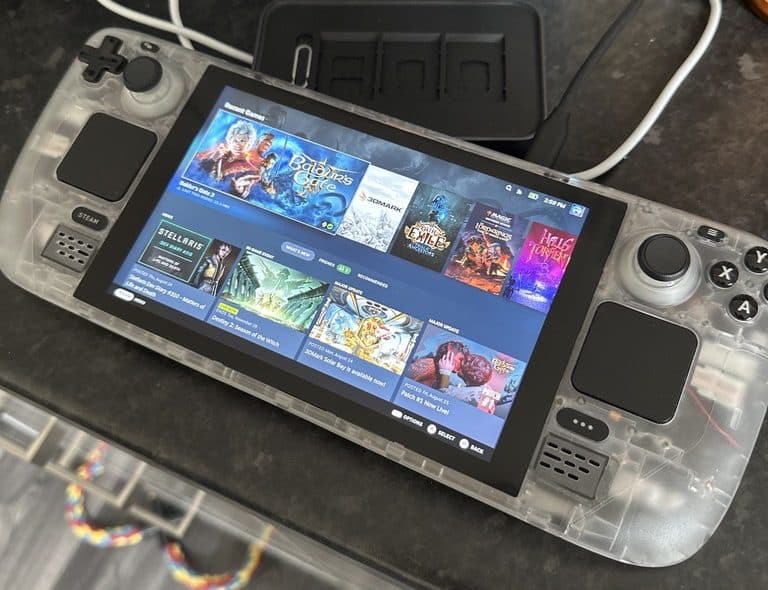
I’ve been loving playing the Steam Deck with the DeckHD. If you’re brave enough, it’s absolutely worth doing. This isn’t a beginner’s replacement job though. If you’ve never seen inside a PC or laptop before, turn the other way. Come back after tinkering with a simpler machine, or crack open an old laptop.
The troubles continue
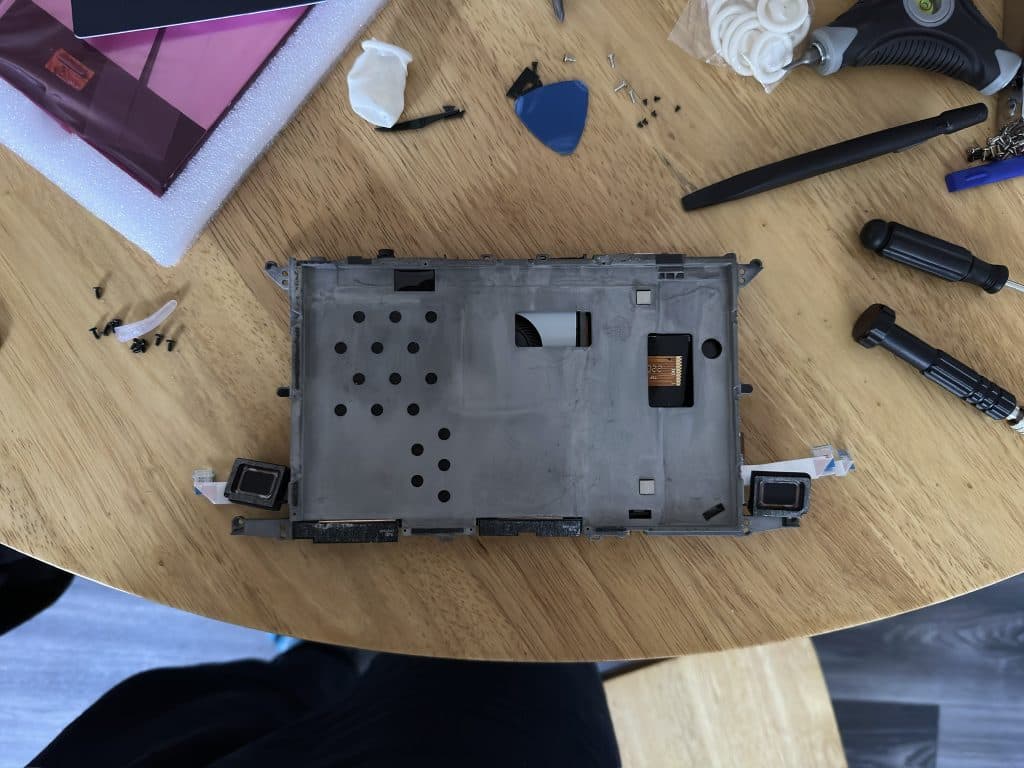
Holding the core of the Steam Deck, with its metal tray for containing the screen is petrifying. It’s naked and vulnerable. I had a yearning to put it into a box and see if I could figure out how to make it into a modern-day Steam Machine.
Putting the Steam Deck back together once the DeckHD was fitted couldn’t have been easier. JSAUX’s little tray let me quickly work backward, and it’s at this point I had made a grave error.
I hadn’t organized any screws.
For this type of project, don’t rely on Valve’s screws. Again, they feel like they might be on the cheaper side and I found buying a third-party screw kit was much easier.
SSD upgrade
I replaced the SSD with a 2TB Sabrent 2230, and in a small bit of embarrassment, had to refer to my own guide for how to reinstall SteamOS. This was the least painful part, but don’t put that silver sleeve on the wrong way or lose it. Without it, the drive will begin to heat up and even fail. On a quick boot to check the DeckHD was working, the old drive came up as dying in Linux, despite otherwise operating well.
Once everything was back in place, I found that the Steam Deck’s buttons had come loose. The small rubber pads had become folded a little when squeezing everything back in.
This is where pains started to show up again. I had to dig through the back to get to the front all over again, just to reseat a couple of buttons on each side. I also found that the menu button now had an odd click, but at this point, I can live with that.
Is it worth it to mod the Steam Deck?
 Dexerto
 Would I recommend this process? Unless you’re comfortable with ribbon cables, tiny screws, and potentially stripped screws, no, this isn’t for you. What would be for you is to invest in a company that does it for you.
We recently took a look at the modded Steam Deck supplier Megamodz, who will pre-mod the system for you at an increased, but fair fee.
The process has taught us a lot, and it’s taught us that Valve might have been right to not crack open the Steam Deck after all. Years of my life have been shaved off seeing a stripped screw directly on the motherboard.
At least my games look fantastic on the DeckHD. Seriously. If the DeckHD is the only mod that you want to install, it’s well worth it. Just be careful with the tricky reshelling process.
If you click on a product link on this page we may earn a small affiliate commission.