How to install Moonlight on Steam Deck
 Dexerto
Wondering how to stream games to your Steam Deck? Moonlight is the answer. We guide you through the process of how to install Moonlight on Steam Deck and how to use it.
Remote playing games on the Steam Deck is a great way to combat any likely performance issues when playing the biggest releases natively on your handheld. The handheld is a high-powered piece of tech, capable of running some of the biggest games like Baldur’s Gate 3, however, it’s never going to to match up to your beefy gaming PC.
While you can already remote-play games to the Steam Deck via Stream Link, it is prone to latency issues, which is why alternatives like Moonlight exist. Moonlight is an open-source app that allows you to stream your gaming PC directly to your Steam Deck, so you can take advantage of your pixel-pushing gaming PC setup powers on the go.
Setting up Moonlight isn’t a complicated process, but it can be confusing for first-time Steam Deck owners. With that in mind, we’ve created this handy guide to get you remote-playing games on your handheld with Moonlight in no time.
1. Install Moonlight
 Dexerto
- Switch to desktop mode
- Open Discover and search ‘Moonlight’
- Install Moonlight
First, switch to desktop mode on your Steam Deck. To make navigating through desktop mode easier, we recommend picking up a Steam Deck dock and connecting a mouse and keyboard to your handheld. If you don’t have an external dock at hand, don’t worry, you can still press the ‘Steam’ button and ‘X’ at the same time to bring up the Steam Deck virtual keyboard.
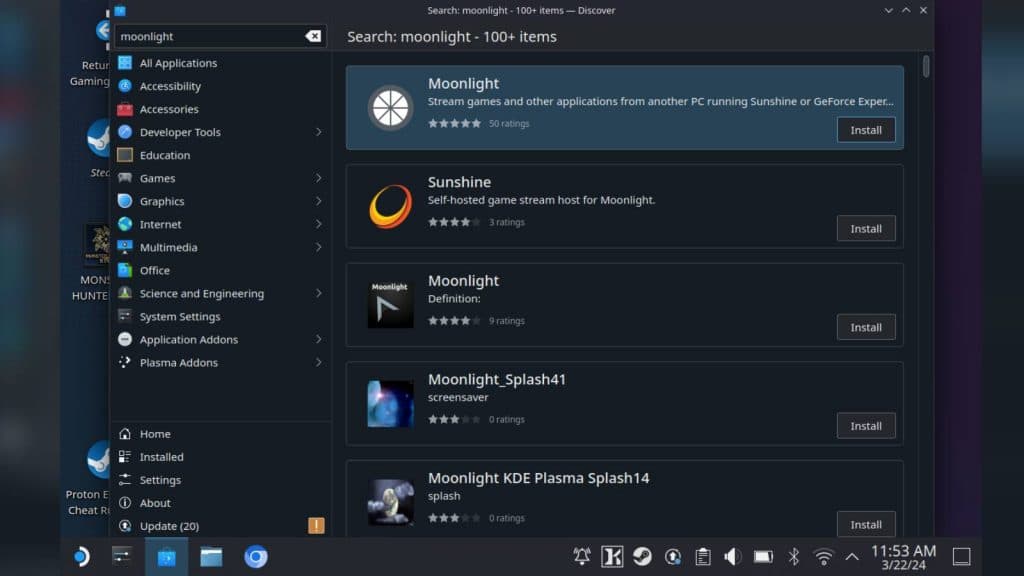
In desktop mode, open the Discover app, which is represented by a small shopping bag icon on the bottom toolbar. Here, you can use your connected mouse and keyboard, or the Steam Deck’s keyboard, to enter ‘Moonlight’ in the search bar.
The Discover app will then bring up a list of applications to download, with Moonlight being the top option. You know you’ll have the right app if you see a white segmented circle with a grey border as its logo.
Install the Moonlight app to your Steam Deck by selecting the app listing, and clicking the ‘install’ text within the top right corner. Once the app is installed, adding it as a non-Steam game will make it easier to use in gaming mode.
2. Add Moonlight as a non-Steam game
 Dexerto
- Select ‘Steam Deck’ icon
- Navigate to ‘All Applications’
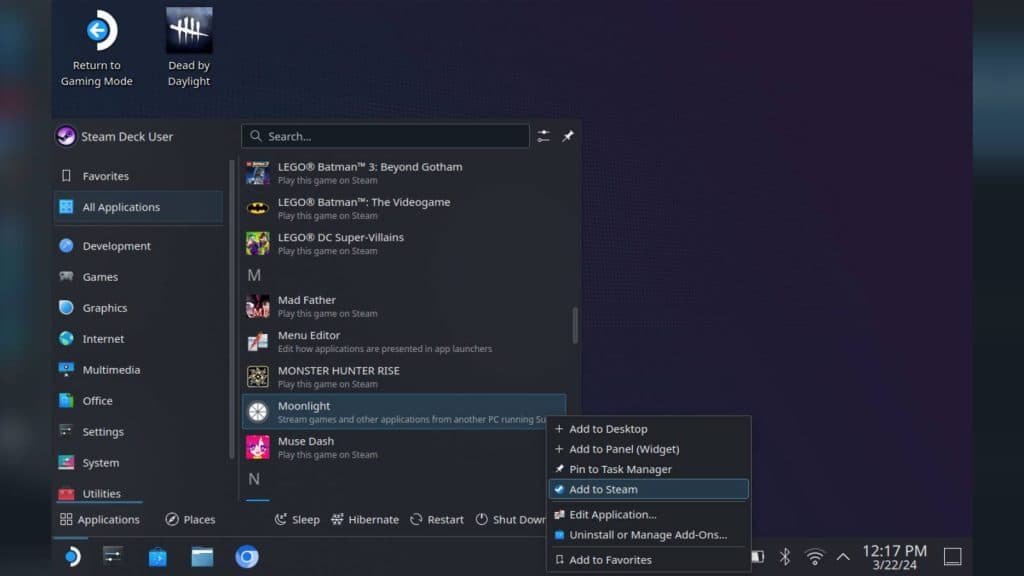
- Find & right-click ‘Moonlight’
- Select ‘Add to Steam’
To add Moonlight to Steam, select the ‘Steam Deck’ logo on the bottom left corner of the desktop mode toolbar. Once selected, navigate to ‘all applications’ and find Moonlight listed amongst all of your installed apps and games.
From here, right-click by using the left trigger button, and select ‘add to Steam’. This will add Moonlight to your Steam library, where it will be listed alongside any other non-Steam game applications and be easier to use when in gaming mode.
3. Pair PC & Steam Deck to Moonlight
 Dexerto
- Turn on PC & Steam Deck
- Ensure PC & Steam Deck are on the same network
- Enter pair PIN from Moonlight on PC
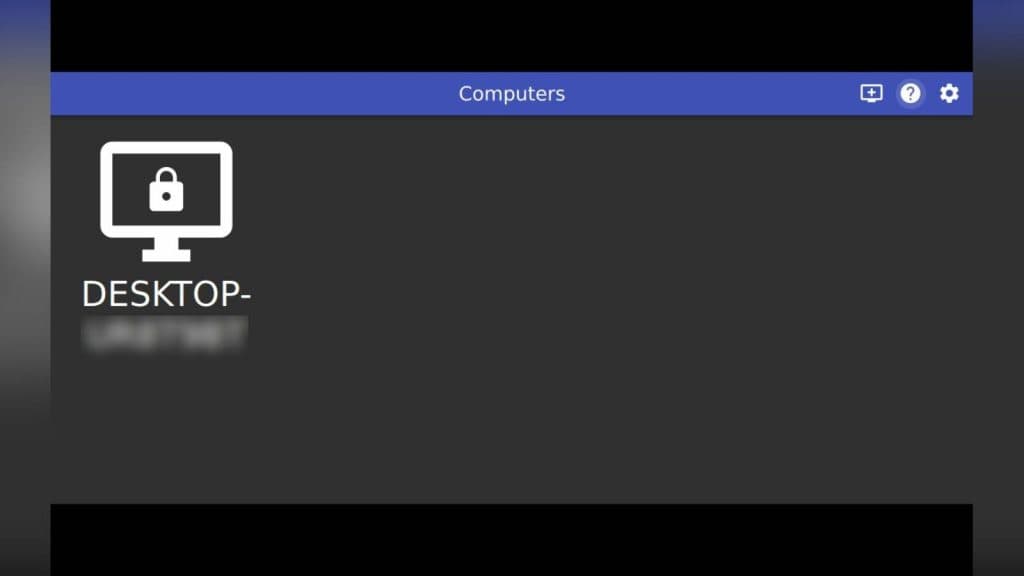
To start using Moonlight on your Steam Deck, first ensure both your handheld and gaming PC are running on the same network. Once you have your tech up and running, open up Moonlight by selecting it from your ‘non-Steam game’ library on gaming mode.
Once Moonlight has loaded up, the app should automatically find your gaming PC and list it as an available source. To start pairing, click your gaming PC from the source list and enter the PIN Moonlight displays on your PC when prompted.
From there, simply run a game on your PC and it will remotely play to your Steam Deck, letting you make the most of your pixel-pushing desktop if the handheld isn’t quite cutting it with your favorite modern games.
How to install Sunshine for PC’s with AMD or Intel’s GPUs
- Go to github.comLizardByte/Sunshine/releases/tag/v0.19.1
- Find ‘sunshine-windows-installer.exe’
- Install Sunshine
If Moonlight can’t find your gaming PC as a source, installing Sunshine is the answer. You can install the Sunshine open-source server by downloading the most recent .exe file from GitHub.
When Moonlight launched, it worked by taking advantage of the Nvidia GameStream protocol. Gamestream was originally intended to allow streaming of your Windows PC to other devices, yet it has since been shut down by Nvidia. Luckily, Sunshine exists so you can still remote play games through Moonlight, even if you don’t own a Nvidia graphics card.
Moonlight vs Stream Link
When Moonlight was originally available on the Steam Deck, it brought HDR support which had since been officially lacking from Valve. While the release of the Steam Deck OLED has brought official HDR support to the table, apps like Moonlight still offer valuable alternatives to remote playing games on the handheld.
You can remote play games from Steam to the Steam Deck through Stream Link, with no additional apps required. But, it has notably worse latency than Moonlight, and can only stream Steam titles directly.
With Moonlight, and Sunshine at hand, you aren’t limited to purely remote-playing Steam games but can remote-play Xbox Games Pass, and just about any game from your desktop PC to your handheld.