How to use Snipping Tool on Windows
 Dexerto
Wondering how to take screenshots on your PC? Windows makes it straightforward thanks to a handy feature named the Snipping Tool. We guide you through how to use Snipping Tool on Windows, so you can capture your display like a pro.
The Snipping Tool is one of Windows’ most useful features and has been present on the OS for over 10 years. Snipping Tool lets you take screenshots of your display, whether you want to capture the full-screen, or individually cropped areas.
If you’re new to using a Windows-based device or used to other screen-capturing software, it can be daunting to know how to first get your head around the app.
With that in mind, we’ve outlined all you need to know about using the Snipping Tool in Windows. That way, you can spend less time messing around, and more time taking screenshots.
How to find the Snipping Tool
 Dexerto
- Turn on your PC
- Press the Windows key
- Search ‘Snipping Tool’
- Open ‘Snipping Tool’
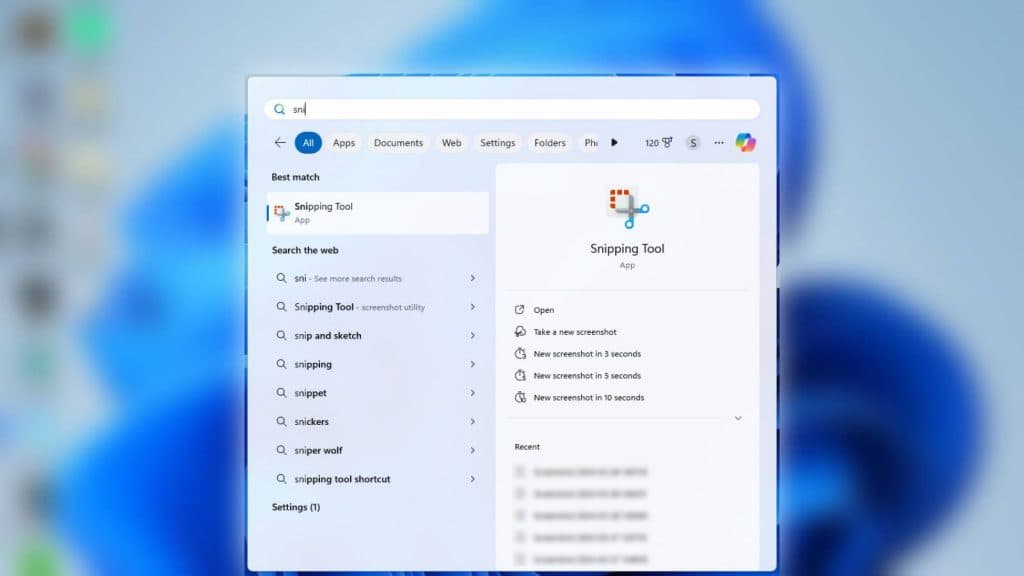
To find the Snipping Tool on your PC, press the ‘Windows key’ on your keyboard, or click the Windows logo on your toolbar, to bring up your systems menu.
From here, use your mouse to click in the search bar and type ‘Snipping Tool’. (You’ll know you have the correct app if the icon features a pair of scissors, with 5 small red squares on a white background.)
Select the ‘Snipping Tool’ app from the list, and then you’ll be able to begin to take as many screenshots, or screen captures, as you wish.
How to take screenshots with the Snipping Tool
 Dexerto
- Open Snipping Tool
- Select ‘+ New’
- Highlight area you want to screenshot
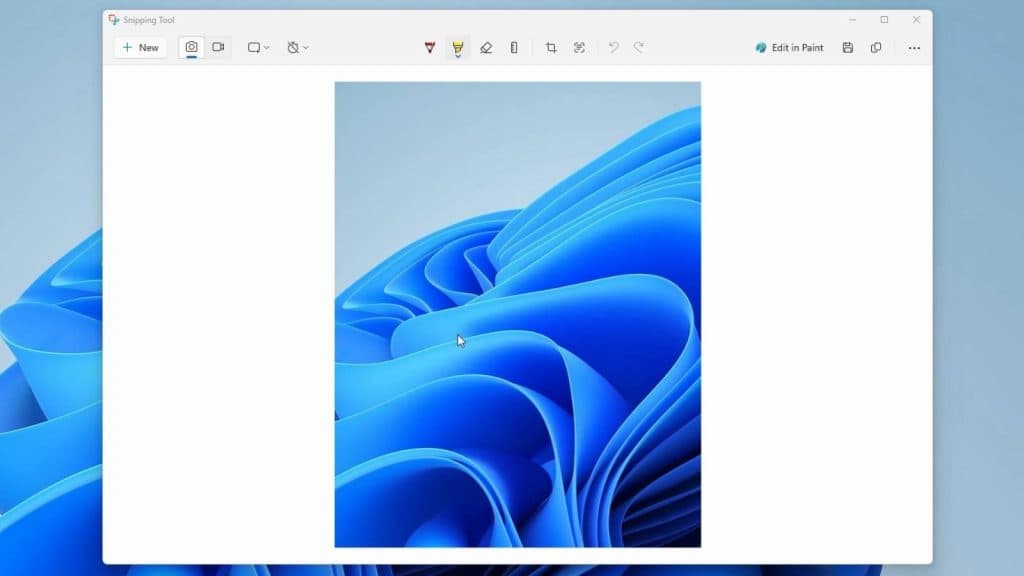
To take a screenshot on Snipping Tool, open up the free Windows app and you’ll be presented with a pop-up box with a list of options to choose from. From here, select the button labeled ‘+ New’ and ensure the icon of a camera is underlined in blue.
Once a small grey crosshair has appeared on your screen, drag that across exactly what you want to screenshot, and the Snipping Tool will do the rest. The app should now display the screenshot, which you paste into other applications, edit, or just save to your PC.
If you prefer shortcuts, press the ‘Windows logo key + Shift + S’ on your keyboard and it will automatically open up Snipping Tool. Entering this shortcut will instantly bring up the cropping part of the screenshotting process.
If you’d prefer to take a screenshot of the full screen, select the small icon featuring a rectangular icon, and select ‘full screen’ from its drop-down menu. Here you can also choose between the options of screenshotting an individually opened window on your PC, or even a free-form shape of your choosing.
How to take delayed screenshots with Snipping Tool
- Open Snipping Tool
- Select clock icon
- Pick preferred time delay
- Select ‘+ New’
If you’d prefer a few seconds to prepare your screenshot, you can set a time delay with Snipping Tool. To take a delayed screenshot, select the clock icon from the app, and select from one of the three time delay options from the drop-down menu.
Here, you can pick between a three-second, five-second, or ten-second delay, giving you ample time to organize your display for your screenshot. After selecting one of the second delay options, there will now be a delay after selecting ‘+ New.’
If you want to switch off the time delay, select the clock icon and pick ‘no delay’ from the list of available options.
How to record your screen using the Snipping Tool
- Open Snipping Tool
- Select video-camera icon
- Press ‘+ New’
- Highlight area you want to capture
- Press ‘Start’
The Snipping Tool doesn’t just allow you to screenshot your display, but capture it too. Through the Windows-based tool, you can record your screen, with or without a microphone, and share your footage online for all to see.
To screen capture through Snipping Tool, open up Snipping Tool and select the video-camera icon that’s located on the right side of the camera icon. You’ll know if it’s selected if the icon is underlined in blue.
With this selection, selecting ‘+ New’ will pop up a grey crosshair which you can use to highlight any part of your display. However, instead of taking a screenshot, once you’ve highlighted what you want to record, a small toolbar will appear at the top of the screen.
Press start to begin your screen recording, and a short 3-second timer will count down. To stop recording, select the red square on the same toolbar. Afterwards, the clip you just recorded will be available to edit in other software, or just save to your PC for later viewing.
If you want to add some narration to the clip, select the small microphone icon on the toolbar when recording.