How to uninstall Edge in Windows 11
Wondering how to uninstall Microsoft Edge Browser in Windows 11? Fear not, we’ve gone through all the steps on how to remove Edge browser from your PC with this handy guide.
Many Windows 11 users might not want to use the preinstalled Edge browser on the OS. However, uninstalling Edge is no walk in the park.
Windows 11 not only makes it as difficult as possible to change your default web browser, but it also makes it almost impossible to completely remove Microsoft Edge from your system.
There are ways around this, but they do come with some caveats and downsides. For one thing, many small Windows applications such as the Weather widget rely on Edge in order to function. Likewise, the AI Assistant Copilot is entirely dependent on Edge, so removing Edge will also disable Copilot.
Remove Microsoft Edge using Geek Uninstaller
This is by far the easiest and safest method. There are program uninstallers available on the internet that bypass Microsoft’s attempts to stop you from uninstalling Edge. Geek Uninstaller is one of the most reputable and stable.
- Download and install Geek Uninstaller
- Open Geek Uninstaller
- Right-click on Microsoft Edge and select “Force Removal”
- Once this is completed, restart your PC.
Edge may try and reinstall itself when a new update for Windows 11 rolls out. When this happens, just go through the steps above again.
Remove Microsoft Edge using the Registry
Firstly, be sure you are sure what you are doing. Tinkering with the Registry can cause significant damage if you make a mistake. Make sure you have all your important data backed up and set a Restore Point, just in case.
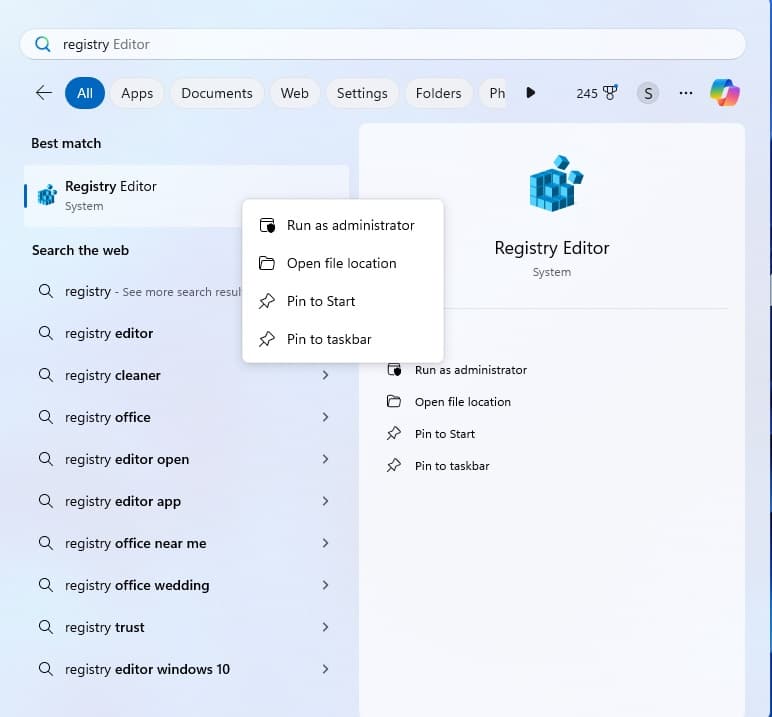
- Open the Windows 11 Start Menu
- Search for “Registry Editor” or “RegEdit” and select the top option.
- Right-click and select “Run as Administrator”
- Using the left sidebar, navigate to the following file path: HKEY_LOCAL_MACHINE > SOFTWARE > WOW6432Node>Microsoft>Windows>CurrentVersion>Uninstall>Microsoft Edge
- In the right-hand pane, right-click on NoRemove’ and select “Modify”
- If this option is not available, instead right-click on an empty part of the pane and select New > DWORD (32-bit) Value then name it “NoRemove”
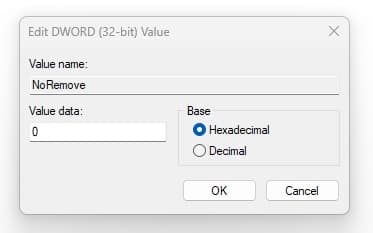
- You should then see a Window with a text box marked ‘Value Data’. Change the value to 0. If you had to create a new value, this should already be set to 0, but double-check.
- Close the Registry Editor and restart your PC
- Open the Start Menu and navigate to the Settings app
- Select Apps and then Installed Apps
- Once you have located Microsoft Edge, select the three dots on the right and select “Uninstall”
- Click “Uninstall” again when it asks you to confirm and once again in the dialogue box that appears.
- Restart your PC
Microsoft Edge should now be removed from your PC.
How to uninstall Microsoft Edge using Command Line
Though we are far removed from the DOS era, it is still possible to make changes using the command line interface in Windows 11. Please note that Command Line and Power Shell may look similar, but they are not the same thing.
Firstly, you will need to update Microsoft Edge to the latest version and then follow these steps:
- Open the Start Menu and navigate to the “Apps” page
- Find Microsoft Edge and click the three dots
- Go to “About Microsoft Edge” and make a careful note of the version number of Edge. You will need this shortly
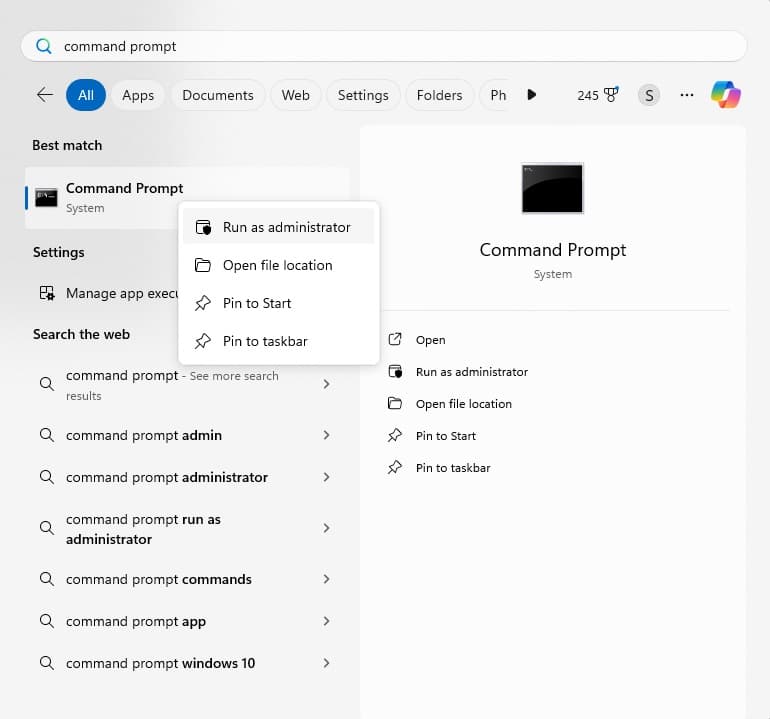
- Go back to the Start menu and do a search for “Command Prompt”
- Right-click on Command Prompt and select “Run as Administrator”
- Once the black command line window appears type cd/ into the window and press enter
- Now here is where you will need the Edge version number. Type in the following test into the command line, replacing [EdgeVersion] with the Version number you noted down earlier: cd Program Files (x86)\Microsoft\Edge\Application\EdgeVersion\Installer
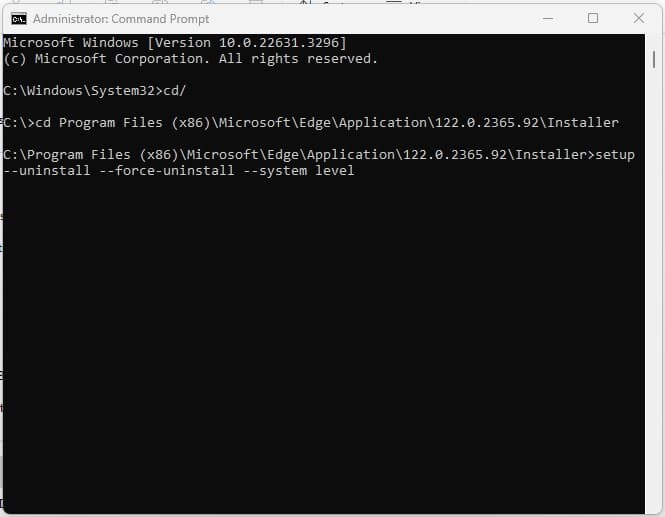
- Press enter, then enter the following code and press Enter again. This will run the commands: setup –uninstall –force-uninstall –system-level
- If you see the Microsoft Edge icon has vanished from your desktop, then this process has succeeded.
How to stop Microsoft Edge from reinstalling
Of course, since Microsoft Edge is part of Windows 11, a new Windows update could allow the browser to reinstall itself. If you want to prevent this, you will need to use the Registry Editor.
- Open the Windows 11 Start Menu
- Search for Registry Editor or RegEdit and select the top option
- Right-click and select ‘Run as Administrator’
- Navigate to the following pathway in the left-hand pane: HKEY_LOCAL_MACHINE\SOFTWARE\Microsoft
- Right-click on the Microsoft folder and select “New – Key”. Name it ‘EdgeUpdate’ and right-click on it
- Select New then ‘DWORD (32-bit) Value,’ and name this ‘DoNotUpdateToEdgeWithChromium.’
- Once this has been created, double-click on it to open a window. You will see a text box marked ‘Value data’. Change this value to 1. Click ok to confirm and close the Window.
Microsoft Edge should now be completely removed from your PC.