How to get better at warding in League of Legends: Vision control guide
 Riot Games
Wondering how to get better at warding in League of Legends? Here’s everything you need to know to establish solid vision control on the map in every role.
As you continue to rise through the ranks in League of Legends, you’ll very quickly realize that having good vision control is the key to success. Therefore, knowing how to get better at warding in League of Legends is vital.
Whether it’s to stop pesky junglers from ganking your lane or establishing your own network of wards to help ensnare those who dare to enter your jungle, proper warding is essential at every level of play and will give you a massive advantage.
If you’re wondering how to get better at warding in League of Legends, we’ve got you covered with this full breakdown of all things vision control.
Contents
- What is warding?
- Do only supports ward?
- What wards are there?
- Early game warding
- Mid/late game warding
 Riot Games
What is warding in League of Legends?
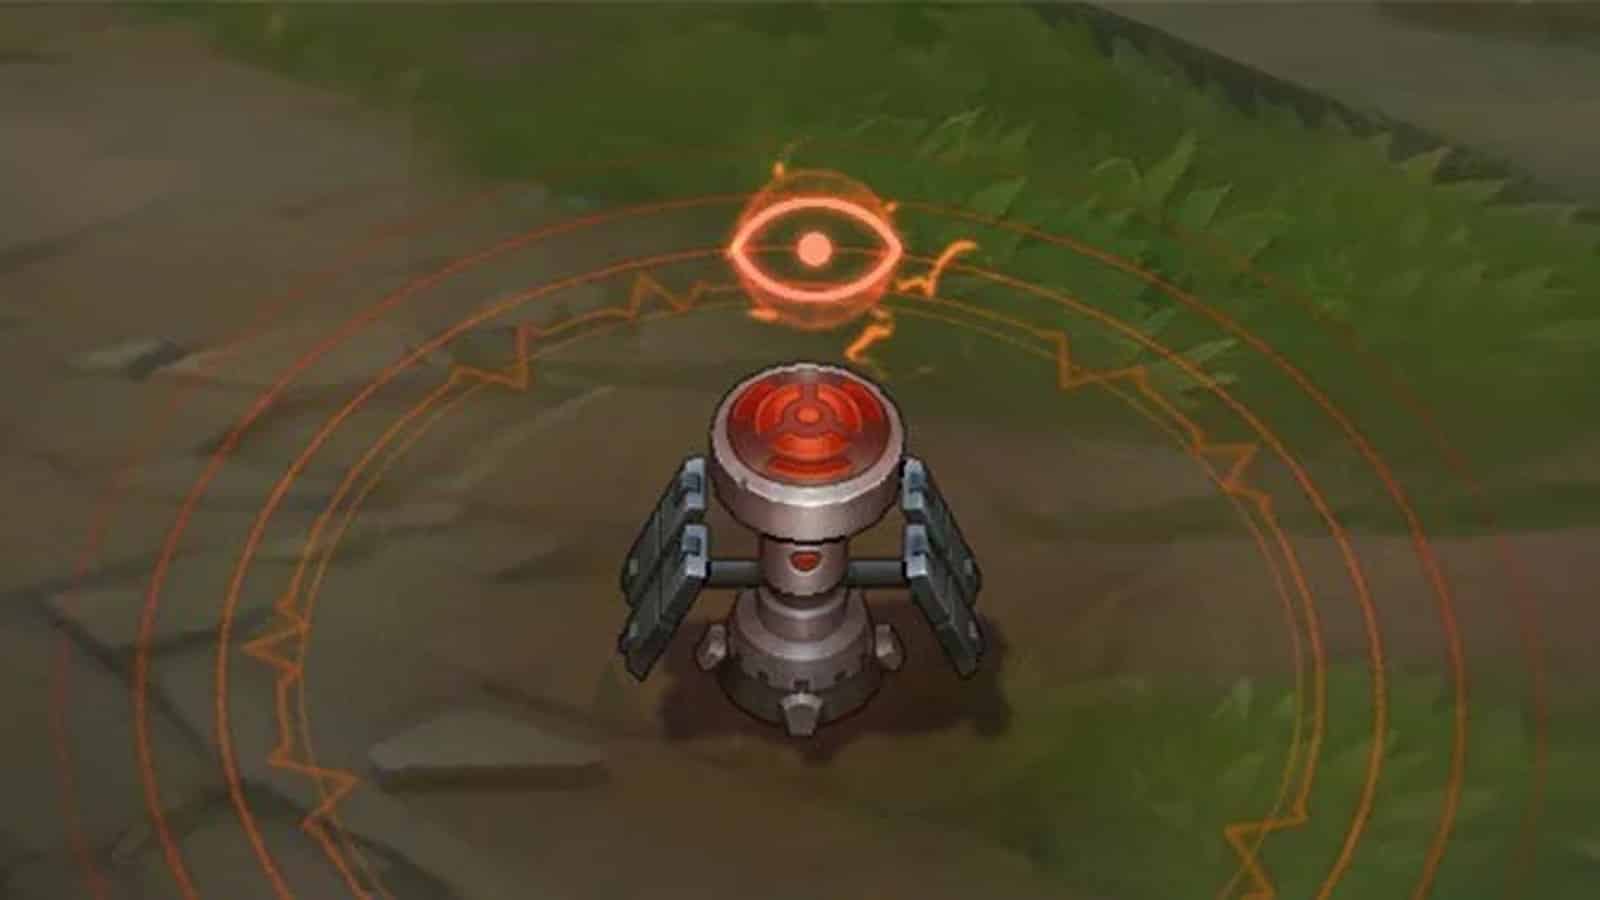
At its core, warding is all about controlling the battlefield. Most of the enemy’s territory is engulfed in black, known as fog of war.
Wards effectively dispel this, granting a small circle of clarity around the ward itself. This means you’ll be able to see enemies as they step within the ward’s radius, allowing you to react appropriately.
Do only supports ward in League?
The idea that support players are the only ones that need to ward is, at this point, archaic. Everyone has free wards, and everyone should be contributing to providing vision control. Learning how to ward and read the map properly to track your opponent is an essential skill, and can often play a big role in helping you climb the ranks.
What wards are there in League of Legends?
There are four different types of wards in League of Legends, each of which do different things. Zombie Wards and Ghost Poros are only available to those running the Domination rune tree, but often you would forgo these for Eyeball Collection instead.
That said, if you’re running Umbral Glaive, Zombie Ward stands to give you some incredible value. You’ll want to nab that rune if you’re playing a character that can fit Umbral into their build.
| Ward | Available level | How many you can buy | What it does | Recommended role |
| Stealth Ward | 1 | 1, alongside any obtained via Support items (Spellthief’s Edge, Steel Shoulderguards, Relic Shield, Spectral Sickle) | Provides a small radius of vision around the ward until it is destroyed or times out (90s, three hit points) | All roles |
| Control Ward | 1 | 2 | Provides a small radius of vision around the ward until it is destroyed (four hit points) | All roles |
| Oracle Lens (Red Trinket) | 1 | 1 | Creates a radar-like radius that sweeps around the player, revealing and disabling wars, as well as showing traps and enemy champions. | Jungle, Support |
| Farsight Alteration (Blue Trinket) | 9 | 1 | A ward that can be dropped from 4000 units away that reveals the area for two seconds and champions inside for five | Top, Mid, ADC |
| Zombie Ward | Domination rune tree | 1 | Spawn when you kill an enemy ward. Give sight over 1100 units, are visible to the enemy team, have 1one health, last for 120 seconds | Build dependent |
| Ghost Poro | Domination rune tree | 1 | When wards expire, a Ghost Poro takes their place for 60s. Is scared off by enemy champions. | Build dependent |
Early game warding
Much of the early game is focused around warding – especially as junglers look to gank lanes before players start to peel off for teamfights. This makes having good vision control crucial.
We would advise that you don’t drop any wards before 1:25 unless you’re trying to prevent invades or keep tabs on the enemy jungler early on. Unless you have a clear objective when it comes to dropping wards early, try to wait until your wards last a bit longer so you can get more value out of them.
Also, it can be well worth picking up a Ward Totem as a jungler, dropping a ward on one of your own camps or an enemy camp, backing to base, and then grabbing an Oracle Lens. Some junglers like Lee Sin also depend heavily on Ward Totem, so keep that in mind.
Each role has its own designated ward positions, but these are just general guidelines. If you’ve found a spot that works for you; stick with it!
| Role | Where to ward blue side | Where to ward red side |
| Top | Scuttle crab river bush post 1:25
Control ward in your river bush |
Scuttle crab river bush post 1:25
Top tri-brush |
| Mid | Control ward both bushes, keep the ward to your side of the lane to force enemy overextension
Ward in middle of the lane |
Control ward in both red side bush behind Baron pit, and bottom side curved river bush
Totem wards in both bushes, towards your side of the lane to force enemy overextension |
| Support (ADC to a lesser extent) | Scuttle crab bush post 1:25
Dragon pit Totem ward in botlane bushes to spot enemy supports |
Control ward in botside river bush
Totem wards in jungle bushes (tri-brush if you’re losing lane) |
| Jungle | Enemy Raptor Camp
Control Wards deep in the enemy jungle (or on your own buffs if you’re getting invaded) Control Ward in the back of Dragon Pit |
Enemy Raptor Camp
Control Wards deep in the enemy jungle (or on your own buffs if you’re getting invaded) Control Ward in the back of Baron Pit |
Mid/late game warding
As you start to roam around the map and, in turn, contest objectives and towers, you’ll want to make sure you’ve got as much vision as possible.
When you’re ahead, it’s important to try and place as many wards in the enemy jungle as you can, as well as around major objectives like the Baron or Drakes. This ensures you always have eyes on your opponents.
With major objectives, be sure to get your wards in early in order to spot players as they try to collapse, and use your Oracle Lens sweeper to clear out any vision the enemy team has left there. This means they’ll be walking face first into the dark with no real inclination of where you are. Make sure you also ward the bushes behind each pit, as you never know if some sneaky jungler is going to try and blast cone over for the steal.
If you’re playing from behind, though, you’ll want to make sure that your wards are more centered around your own jungle and your base, otherwise, you may get backdoored without even knowing it. Defensive wards in the river, bottom and top side jungles, and around the mid lane (teams tend to siege through there) are a must.
As a general rule, it’s always worth putting wards at choke points to ensure that, if you see the entire enemy team wandering over to Baron, you can collapse with ease and snuff them out before they even get close.
 Riot Games
So that’s everything you need to do to get better at warding in League of Legends and help your team to victory!
Looking for more League of Legends tips and tricks? Be sure to check out our champion guides below:
Best Top Laners in League of Legends | Best ADCs in League of Legends | Best Junglers in League of Legends