Destiny 2 Vault of Glass Guide: Complete Raid walkthrough and rewards table
 Bungie
Destiny 2 Vault of Glass raid guide walkthrough.
The Raid that started it all has finally returned — the Vault of Glass is now back in Destiny 2. Whether you’ve cleared it before or are navigating your first run, we’ve got you covered with a complete Vault of Glass walkthrough.
When Destiny first launched in 2014, one of the most difficult challenges in all of gaming quickly became available. The Vault of Glass raid unlocked just one week into Bungie’s ever-evolving shooter, setting the bar for what Guardians would come to expect from future raids.
As the game’s first six-man PVE activity, it pushed Fireteams to their limits, demanding extraordinary communication and perfectly executed strategies. Seven years later and it’s still looked at as one of Destiny’s crowning achievements.
Now that it’s finally back in Destiny 2, players are jumping in and figuring out the classic raid all over again — albeit with some tweaks from Bungie to keep the content fresh and challenging, while staying true to the spirit of the original activity.
If you’re struggling to clear a certain encounter or want some help finding hidden secrets, here’s an in-depth guide of everything there is to know about Destiny 2’s Vault of Glass raid.
Contents:
- Opening the Vault
- Defending Confluxes
- Destroying Oracles
- Templar Boss Fight
- Gorgon’s Labyrinth
- Killing Gatekeepers
- Atheon Boss Fight
- Rewards & Loot
Destiny 2 Vault of Glass: Opening the Vault
 Bungie
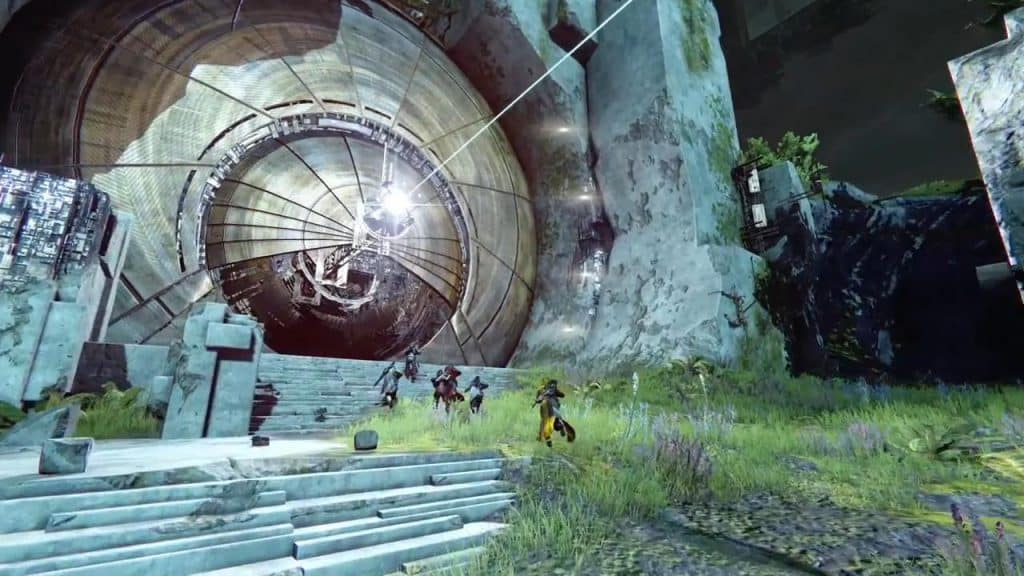
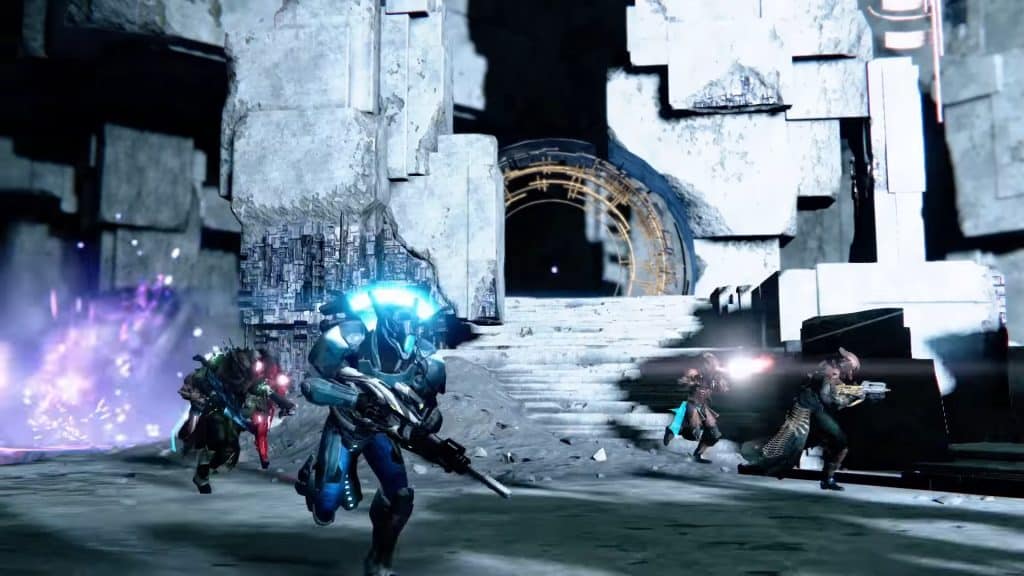
When you load into the Vault of Glass raid, you won’t actually be near the first real encounter. Different from almost every other raid, this one starts you off outside in what used to be a public space in Destiny 1. Your first objective is simple: open the Vault.
Looking around the starting area you’ll notice three Vex sync plates. One to the left side, one towards the center, and one up high on the right side of the map. You’ll want to split into three teams of two so that each group can look after one plate.
Once you’ve sorted your teams, head to the plates and defend them from Vex enemies nearby. Your entire goal here is to defend all three plates long enough to build a spire in the middle of the map which then opens the Vault.
Pesky foes will try to knock you down, but more importantly, they’ll try to interrupt progress by stepping on the plates. Stop them at all costs and keep your three plates clear for a few minutes. If even one plate turns red, it can reset progress for the entire team. However, rest assured that there’s no proper ‘fail-state’ for this activity, as you and your team can respawn at any time.
With all three plates cleared and the spire built, the Vault doors will slide open, allowing you and your team to properly begin the raid. Make sure to loot the chest right inside the gate before moving on to the raid’s first encounter: defending the Confluxes.
Destiny 2 Vault of Glass: Defending the Confluxes
 Bungie
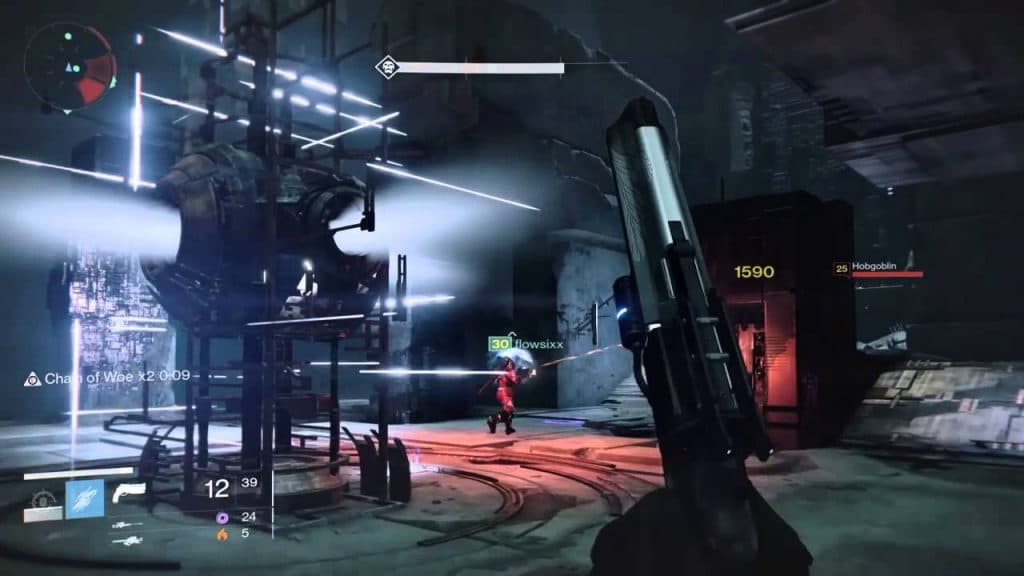
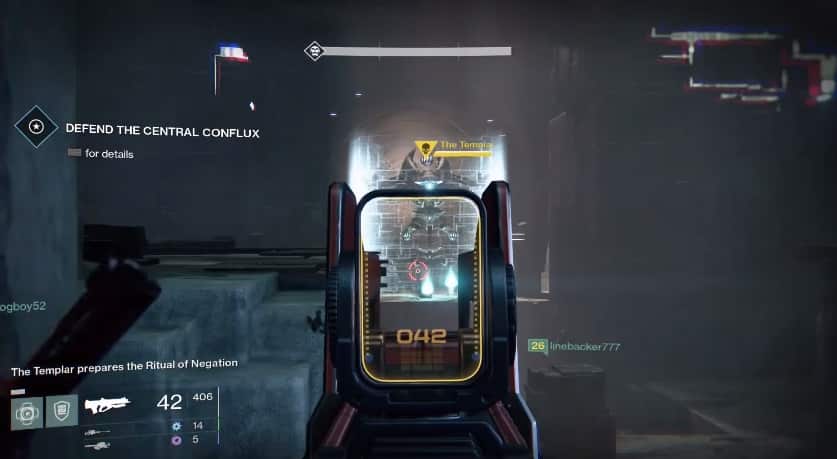
After navigating through the first section of the Vault, you’ll drop down into a brand new combat area. To kick things off here, all you really need to worry about is clearing Vex enemies.
There are three Confluxes that will spawn around the map, one to the left, one to the right, and one near the middle. Similar to the first encounter, your job is to keep Vex away from these Confluxes. They’ll be rushing to each Conflux before kneeling down and sacrificing themselves, and if too many Vex complete their sacrifice, you’ll fail the encounter and have to start over.
At first, you’ll just be focusing on one Conflux at a time. However, you’ll then have to defend two, and finally all three at once. Therefore, it’s recommended that you split into the same three teams of two as before. Each duo should keep a close eye on their Conflux while helping others when they can.
One thing to be wary of during this encounter is green goop on the floor; the Vex Fanatics found inside the Vault contain dangerous goop that spreads over the ground when you kill them. If you happen to step on this substance, you’ll have a new debuff on the bottom left of your screen: Marked for Negation.
If you’re marked by this status effect, you’ll be killed instantly when the next Ritual of Negation wipe from the Templar comes through, which happens roughly once a minute. In order to clear the effect from your Guardian, drop into the very middle of the map and stand inside the cleansing pool.
Once the Confluxes have been defended, collect your loot from the chest and prepare to face the Oracles.
Destiny 2 Vault of Glass: Destroying Oracles
 Bungie
The next section of the raid is often looked at as one of the more frustrating encounters. This phase introduces Oracles to the mix: small bright orbs that appear around the map with a musical chime. Your task is to destroy every single one that spawns in — but with a new twist on the original Destiny 1 mechanic.
To kick the encounter off, the Oracles will briefly appear then fade away. This is to give you a quick look at where they all spawn, so take this opportunity to memorize their locations. However, you’ll also need to take note of the exact order that each Oracle appears.
In a change from the original encounter, where you could simply shoot the orbs in any order, in the updated Destiny 2 version of the raid you’ll now need to shoot them in the exact order that they appear during each phase — otherwise, your team will be wiped and forced to re-do the encounter.
To start out, a single Oracle will spawn, followed by a wave of enemies. Then two Oracles spawn, followed by another wave of Vex. Then three, then four, all the way up to seven Oracles in a single instance. You need to shoot them down shortly after they appear, but make sure you are shooting them in the proper order to avoid an unnecessary wipe.
This is how things can become frustrating. You may clear the first six waves perfectly but miss one Oracle in the seventh round and have to restart the whole encounter. It’s vital that every single player knows all Oracle spawn locations, and their spawn order, before you begin each phase.
It’s truly worth taking the time to learn their audio cues and have their patterns locked down, so if there’s ever a teammate that goes down, other players can take over and clear their designated Oracles. Not only will this intel help for completing the Oracle encounter, but it comes in handy for the upcoming boss fight as well.
Destiny 2 Vault of Glass: Templar Boss Fight
 Bungie
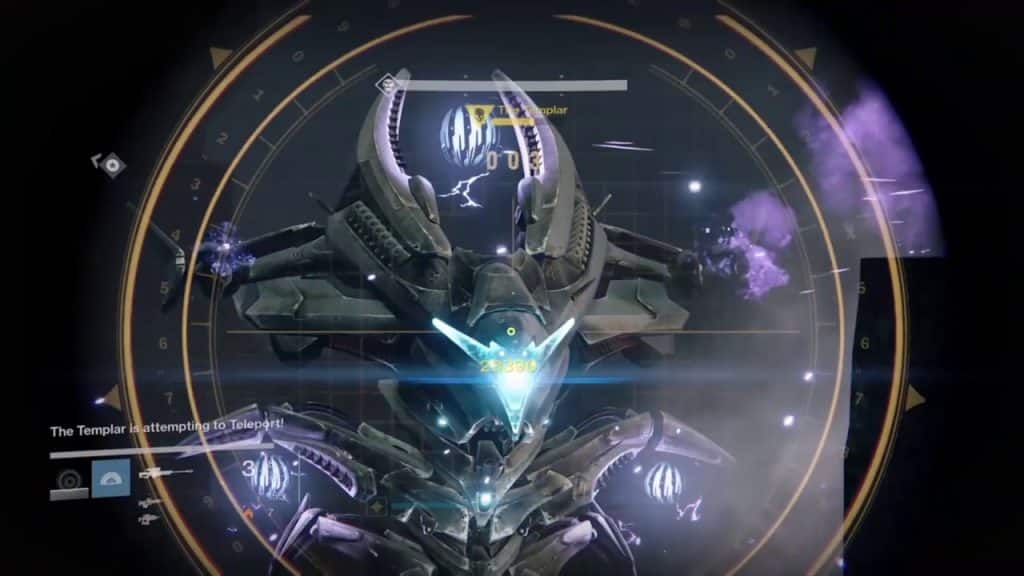
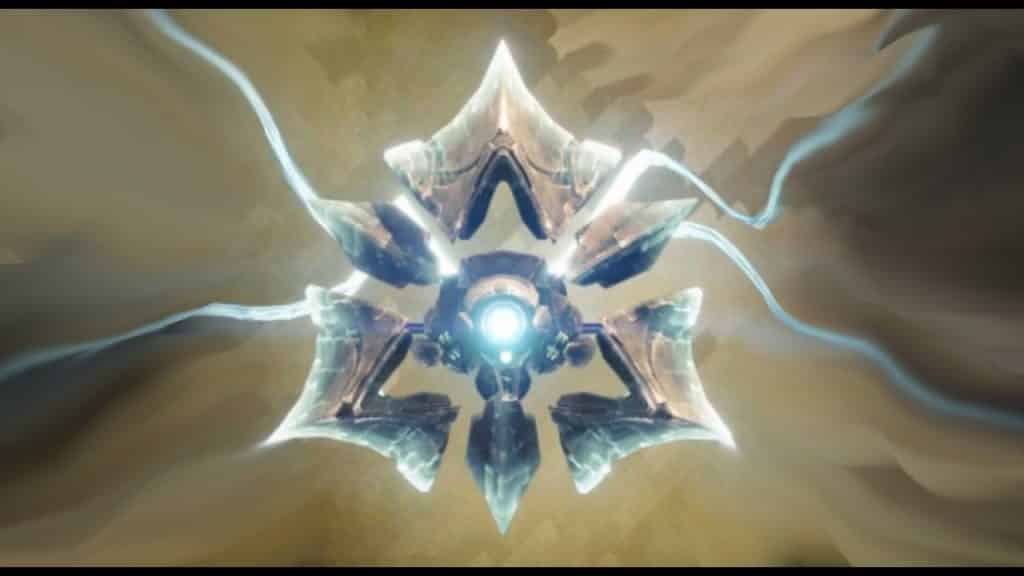
After defending the Confluxes and clearing wave after wave of pesky Oracles, you’ve finally reached the first boss fight in the Vault of Glass. The Templar encounter is quite simple mechanically, but it can be extremely demanding when it comes to staying alive and maximizing your damage output.
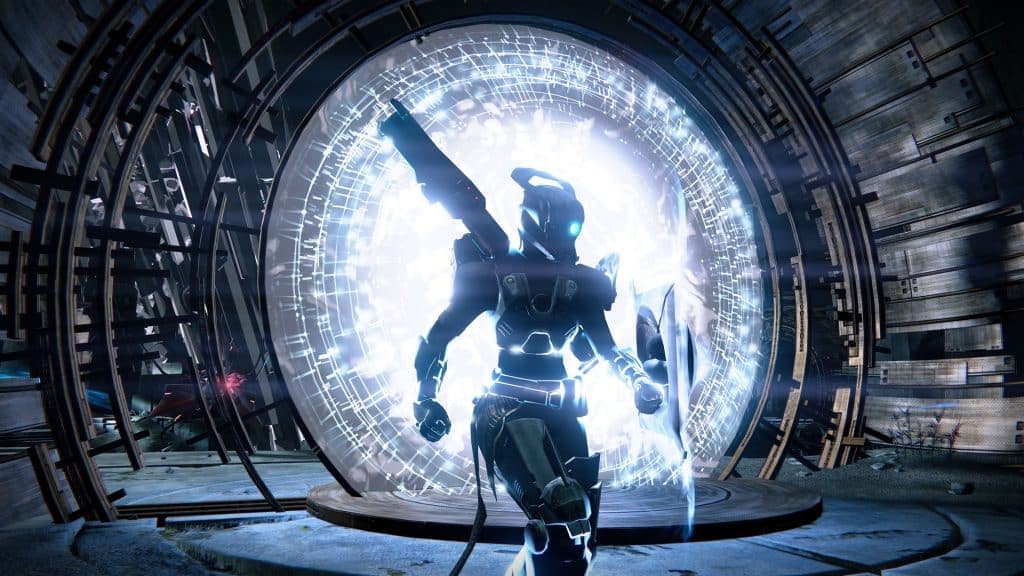
First things first, you’ll notice a Relic has appeared in the arena. Arrange your Fireteam so that you have one dedicated Relic holder and one backup Relic holder just in case the first player goes down at any stage.
For those in control of the Relic, you’re undoubtedly the most important part of this fight. While it can be used as a melee weapon, the Relic serves two main roles. First, it comes with the ability to cleanse your teammates. Holding down the ‘fire’ button will generate a large bubble around you, and anyone that steps inside will have their Negation marks removed – similar to how jumping in the middle of the map cleansed players during the Conflux encounter.
Cleansing allies is absolutely vital in this boss fight. Be sure to keep an ear out for any of your teammates who might get marked, and rush to them as soon as possible. If you hold off on cleansing them for too long, it’ll lead to an instant death and most likely a subsequent wipe.
Next up, the Relic also comes with a key ability that allows for extra boss damage. Your Super charges exceptionally fast with the Relic in hand, however, it’s not your average Super. Activating the ability will shoot out a burst of energy. Aim this at the Templar’s shield to temporarily knock it down and allow for a quick damage phase.
 Bungie
Before your team starts blasting, you’ll need to free any players that have been detained (trapped in Vex bubbles). Upon dropping the Templar’s shield, a handful of your team will find themselves encased at random, and you’ll need to quickly burst those bubbles (by shooting them) which will release those Guardians and allow them to contribute to the damage phase.
Without the Relic’s Super, the Templar’s shield is completely impenetrable. Therefore, you need to make the most of every damage phase. Clear out some other enemies and make sure your team is fully coordinated before bringing the shield down. With everyone set up, you should only need three or four damage phases at most.
All throughout this encounter, three Oracles will be spawning as they did earlier, and the same rules for defeating them still apply. If keeping track of the three orbs during the boss fight isn’t bad enough, unlike in Destiny 1 (where killing the Oracles during the Templar encounter was optional), if you fail to clear them in Destiny 2’s version, your team will be wiped.
As with most boss fights in the early Destiny raids, the Templar does have an enrage timer. If you take too long, the powerful enemy will decide to cut your run short and instantly wipe the whole team. Try to act quickly and get through your damage phases one after the other to avoid an enrage, and an early end to the encounter.
In addition, the boss will occasionally teleport around the arena, cutting your damage phases short. However, if you can place a teammate in the exact location where the Templar plans to teleport before it moves (noted by a small red circle), the enemy will be stuck in place, extending your damage phase, but also spawning more enemies you’ll need to deal with, so choose wisely.
Once you’ve dealt with the Templar and its allies, you can collect your loot from the area’s chest and move on to the infamous Gorgon’s Labyrinth.
Destiny 2 Vault of Glass: Gorgon’s Labyrinth
 Bungie
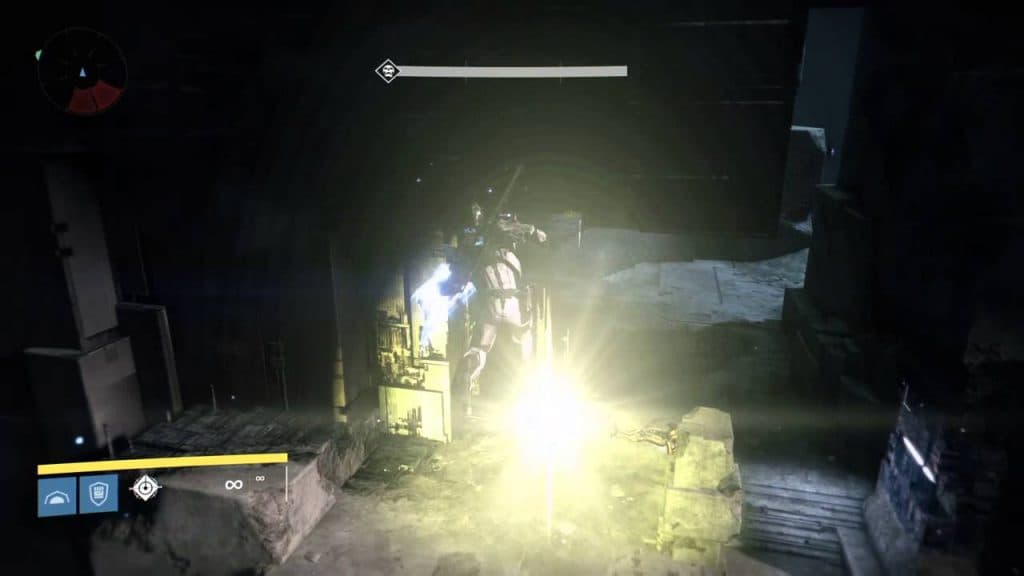
With the Templar down, it’s time to travel through to the second proper area of the raid. After pushing forward and dropping further into the depths of the Vault, you’ll soon come across some not-so-friendly Gorgons.
Another enemy type exclusive to the raid, Gorgons (modified versions of the standard Harpy Vex) will absolutely wreck your squad if you’re not prepared. Their entire purpose is to track you down and instantly wipe your fireteam. As a result, this phase is purely focused on being stealthy.
Your goal is to get through this dimly lit area without altering the Gorgons. Take a few attempts to learn their movements, study their paths, and memorize their locations. You want your full team moving as a pack, quickly clearing gaps at the right times to avoid the deadly foes. No one should be firing weapons or even sprinting unless it’s necessary.
First up, you’ll want to hug the left-most wall in the starting area. Moving forward you’ll come to the first big opening with Gorgons appearing in all directions. Wait for the right moment and proceed into the opening, using a nearby rock to scale onto high-ground in the very center. It can be rather finicky here so try to avoid clumping too tight with your teammates and messing with each other’s jumps.
When you’re all set, stick to the left-hand side and look for a smaller cave entrance across the room. Make a dash for this opening and follow it through until you drop out of the Gorgon-infested area.
It’s worth noting you can actually kill Gorgons. They’re not impervious to damage but they will absorb a ridiculous amount. If you happen to get spotted but want to keep the run alive, it’s going to take all your heavy ammo, a few Supers, and just about everything else you’ve got. Even then, you’ll only have a few seconds before detonation, so kill them quickly if you want to keep the run going.
Destiny 2 Vault of Glass: Killing Gatekeepers
 Bungie
After clearing the Gorgon’s Labyrinth, you’ll be treated to a simple jumping section with disappearing platforms. Even on your first run, this section shouldn’t be all too difficult so long as you time your movements in accordance with the relocating terrain. Jump across and hug the wall as tight as possible. Progress along the incredibly thin ledge, jumping out and floating back inwards where necessary, and you’ll have this platforming challenge ticked off in no time.
Once you’re through, a door will open and you’ll be in the final area of the Raid. This is where things truly ramp up and the level of complexity reaches new heights.
- Read More: Destiny 2’s new Override game mode explained
Before starting a proper run, you’ll first want to familiarize yourself with two Vex plates in the area. No different from the plates you defended in the first part of the raid outside of the Vault, players must stand inside to trigger an effect. These plates will open two corresponding portals that will teleport you to completely different locations, perhaps even different timelines, depending on how you look at the lore.
The left plate sends you to a red map you can refer to as Mars. The right sends you to a more vibrant green map that teams often refer to as Venus. While these aren’t confirmed locations, the simple labels are absolutely crucial for the final sections of the raid, so be sure to drill these into your team before getting underway.
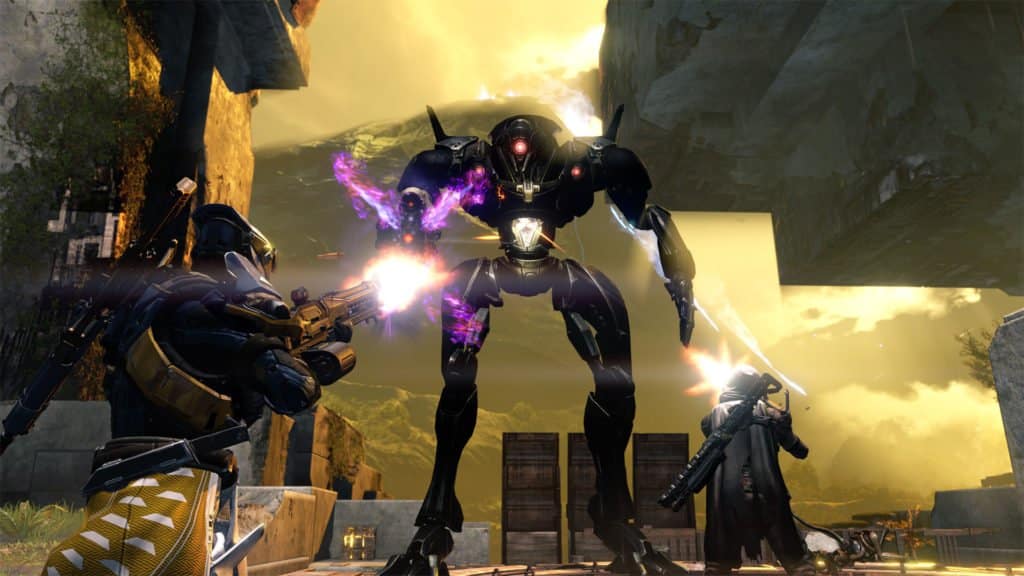
When you’re ready to start an actual run, you’ll need to clear a Gatekeeper before anything else. Have all six players get their most powerful weapons out to burst the giant foe down as quickly as possible.
 Bungie
With the first Gatekeeper dead, retrieve the Relic it drops and prepare to activate the two Vex gates. Split your team into the same three duos as before. Two players will try to remain on the plates (one on each) to keep both portals active. Two more will spread out a little and clear adds in the area. Meanwhile, the final two players each get to head through one of the portals.
For the players heading to Mars and Venus, you’ll immediately have your hands full. There will be another Vex Conflux in each of the two worlds that you’ll need to defend. Keep clearing out enemies until a powerful Minotaur with an immunity shield spawns, and you’ll need to call this out immediately. The teammate inside the Vault with the Relic will then need to jump through that portal, take out the immunity shield, and help take down the Minotaur.
However, this mechanic also comes with a catch — anyone who teleports to another area with the Relic will be hit with the Teleport Destabilized debuff for the next 45 seconds, meaning you can’t go through another portal until the timer expires. Your team will need to coordinate responsibility for the Relic at a moment’s notice, and make sure every player is ready and willing to pick it up or swap it depending on the circumstances.
 Bungie
During that entire process, Gatekeepers will continue to spawn back in the Vault. Whenever this happens, all four teammates in that arena should focus their fire on the enemy and take them down immediately, because as long as a Gatekeeper is alive, the portals to Mars and Venus will be closed, stopping the Relic rotation in its tracks and often leading to a wipe.
It’ll be a mad rush, with different teams trying to communicate different things while focusing on different objectives. Try to stay calm and only call for help when absolutely vital. Make sure to keep communicating as the chaos unfolds, and be ready to switch roles at a moment’s notice.
After several immune Minotaurs have been defeated on each side, another Conflux will appear in the center of the Vault. At this point, your entire team can make their way back from Mars and Venus, and should focus all their attention on defending that final Conflux from another flood of Vex enemies.
Even more shielded Minotaurs will appear during this phase, and they should be the primary focus of the Relic holder while everyone else keeps on top of the other adds. If you can survive the vicious onslaught and take down all of those powerful enemies, you’ll be set to loot another chest, and then prepare to face the final raid boss — Atheon, Time’s Conflux.
Destiny 2 Vault of Glass: Atheon Boss Fight
 Bungie
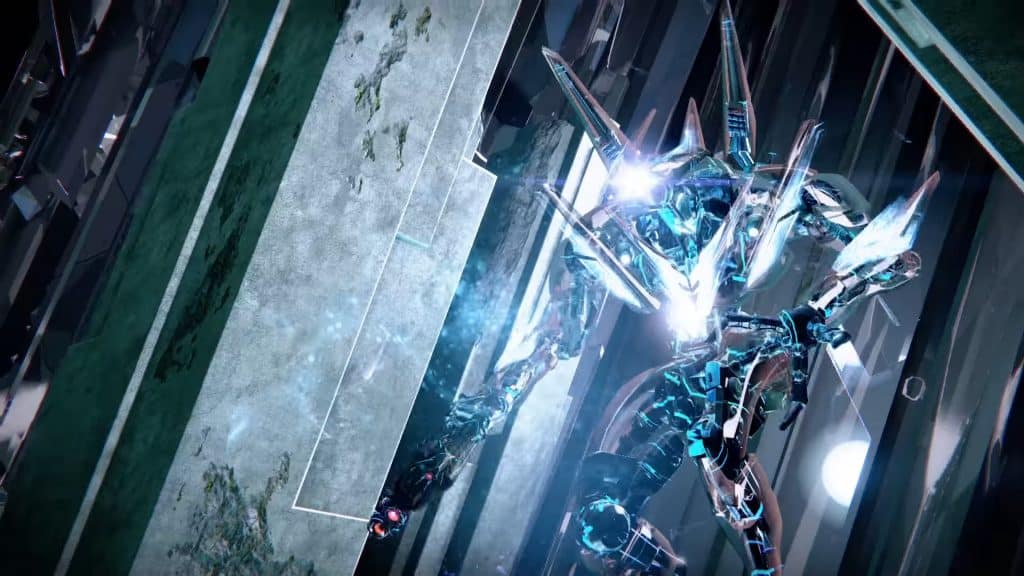
At long last, you’ve reached the final encounter in Destiny’s Vault of Glass Raid. Kudos for making it this far, but here’s where the fun really begins. The Atheon boss fight remains one of the more frustrating in Destiny’s history for a number of reasons. It’s quite a buggy fight and sometimes, things just don’t go your way even if you’re doing everything right. If you fail a run, keep your chin up and try again.
Similar to the previous challenge, this boss fight is designed around the portals to Mars and Venus, and you’ll have two players dedicated to holding down those plates and keeping the portals open.
However, this time around you don’t get to pick the teams. Completely at random, Atheon will teleport three players to either location. You don’t get to decide who goes, or get to plan the when and where. Therefore, it’s essential all six players know exactly what to do in every possible role. To help explain this fight, it’s best to have two labels: Home and Away teams.
Away team objectives
 Bungie
Once the three players are teleported away, they’ll need to call out which location they’ve been sent to. Let your teammates back in the Vault know you’re either on Mars or Venus so they can quickly jump to the correct Vex plate and start opening the portal.
For the three Away team players, you’ll be loaded into one of the two locations with a Relic at your feet. Have one of you grab it and immediately cleanse since you’ll be marked for Negation, and you’ll also need to periodically cleanse yourself and your teammates moving forward. However, in this case, a break in cleansing leads to your screen slowly turning black — a callback to a mechanic from Destiny 1 — so it’s imperative that the Relic holder is cleansing almost constantly.
Two things will be happening for this team while they’re on Mars or Venus: first, there are a few devastating enemies inside that must be cleared immediately. They can wipe you out in the blink of an eye and in this encounter, a single death often means failure.
All the while, Oracles will be appearing once again. Same as before, these orbs need to be shot out of the sky in the order that they spawn in before they completely end the run. However, while two players are focusing on the Oracles, the last teammate needs to be clearing their vision with the Relic. All three of you need to have each other’s backs, moving through the area side by side, and taking care of every single Oracle based on callouts from your team back home — but we’ll get into that later.
You’ll need to repeat the Oracle-killing process three times, and the moment the final Oracle is shot down, you’ll need to quickly return to the Vault to take part in the damage phase.
Finally, as you return to the Vault through the Vex portal, your teammate with the Relic will need to cleanse themselves and their two companions one final time before jumping into the middle of the map to help deal with Atheon.
The moment you step back into the Vault, a brand new buff comes into effect for all six players: Time’s Vengeance. This boosts your Super regeneration and damage output against Atheon, so now is the time for you to lay into the towering boss. As you’re preparing to clear the last Oracle, communicate with the three players in the Vault so everyone can get in position for a proper damage phase.
Home team objectives
 Bungie
For the three random players kept inside the Vault with Atheon, your job is no different from the last encounter. Simply head to the correct Vex plate – either Mars or Venus – and defend it with your life. It’s on you to keep the portal active so that your teammates can return through safely when the time is right.
Making things more interesting, the Vault will be flooded with powerful Harpies, including an exclusive Supplicant sub-type that explode violently when defeated, so make sure to stay on your toes at all times. Try not to clump together too much as you defend the portal and clear out those enemies, making sure they are all wiped out before the Away team returns.
In another change from the Destiny 1 raid, the locations of the Oracle spawns in Mars and Venus are not pre-determined. Instead, the order and locations in which they spawn will appear back in the Vault, and the Home team will need to call this information out the Away team. Adding another layer of difficulty, the Oracle callouts are inverted between the two locations, so the order that the orbs appear for the Home team will need to be reversed when they call them out to the Away team.
Atheon’s damage phase
 Bungie
With both teams doing their jobs correctly, all six players will now be back in the Vault with Time’s Vengeance active for roughly 30 seconds. Everyone should rush to the platform in the center of the map for maximum efficiency. The Relic holder will be able to activate a massive shield to keep you all safe while dealing damage, occasionally dropping the Relic to contribute. Be careful, however, because if the Relic is left on the ground for too long it will de-spawn, and your team will need to wipe.
One thing to watch out for is another Detain mechanic, similar to the Templar encounter from before. One player will be marked with the effect Imminent Detention, meaning they are about to be encased in a Vex forcefield. This player needs to jump off the platform and away from their teammates, as once the debuff is activated if they are still near their fireteam, everyone will be blocked from doing damage to Atheon, and you’ll have to wipe.
Once the teammate being Detained has been freed, group up behind the Relic shield and use your Supers, heavy weapons, and throw everything you’ve got at Atheon. If all goes well, you should take out roughly half of his total health. Afterward, it’s time to rinse and repeat the process once more, potentially two more times if you’re low on damage output or something goes awry.
Soon after each DPS phase, three players will be teleported at random once again. This is undoubtedly the most challenging aspect as all six players need to fully understand the different tasks required. Try to keep comms clear and focus on each step of the encounter one by one. Soon enough, you’ll be an expert and know exactly how to coordinate an attack on Atheon and be wracking up Vault of Glass drops in no time.
Destiny 2 Vault of Glass: Rewards & Loot
 Bungie
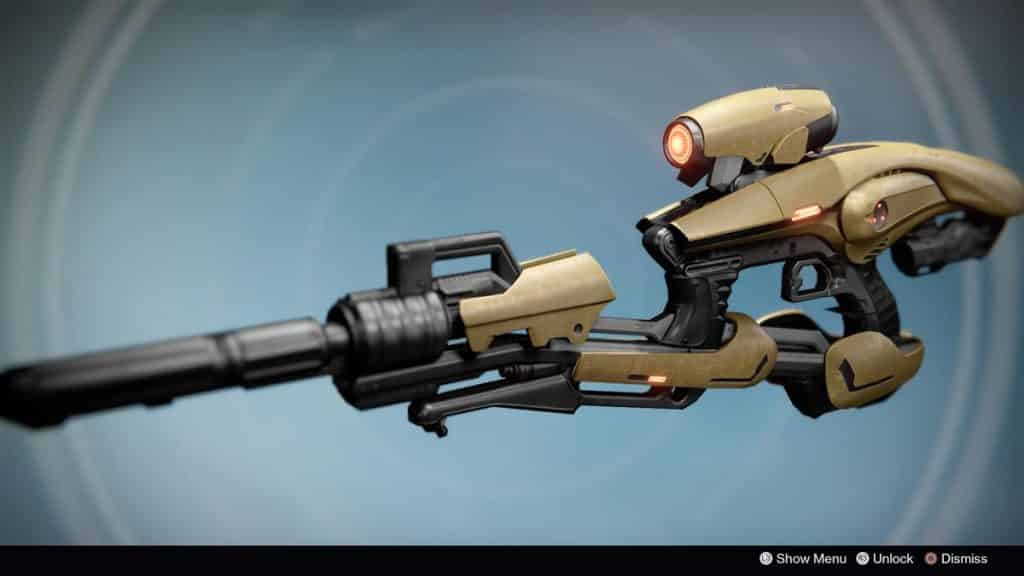
The Vault of Glass raid is officially live in Destiny 2, but we already had an early look at the Vault of Glass loot thanks to dataminers who scrubbed Bungie’s API. A number of fan-favorite weapons have returned, along with a devastating exotic. Below is a full list of what players can obtain from the raid, and from which encounters.
In addition to the encounter-specific and random raid drops, there is an area in the final section where you can spend your Spoils of Conquest to buy more Vault of Glass gear, exactly how the spoils chest works in Deep Stone Crypt.
Destiny 2 Vault of Glass: Weapons
| Weapon Name | Weapon Type | Encounter |
| Vision of Confluence | Legendary Scout Rifle – Solar | 1st (Conflux), 2nd (Oracles), 3rd (Templar) |
| Praedyth’s Revenge | Legendary Sniper Rifle – Kinetic | 2nd (Oracles), 5th (Atheon) |
| Fatebringer | Legendary Hand Cannon – Kinetic | 3rd (Templar), 4th (Gatekeepers) |
| Found Verdict | Legendary Shotgun – Arc | 1st (Conflux), 2nd (Oracles), 4th (Gatekeepers) |
| Corrective Measure | Legendary Machine Gun – Void | 1st (Conflux), 3rd (Templar), 5th (Atheon) |
| Hezen Vengeance | Legendary Rocket Launcher – Solar | 4th (Gatekeepers), 5th (Atheon) |
| Vex Mythoclast | Exotic Fusion Rifle – Solar | Random drop from raid completion |
Destiny 2 Vault of Glass: Titan armor
| Armor Name | Armor Type | Encounter |
| Battlecage of Kabr | Helmet | 4th (Gatekeepers), 5th (Atheon) |
| Kabr’s Brazen Grips | Arms | 1st (Conflux), 2nd (Oracles), 3rd (Templar) |
| Kabr’s Wrath | Chest | 3rd (Templar), 5th (Atheon) |
| Kabr’s Forceful Greaves | Legs | 2nd (Oracles), 4th (Gatekeepers) |
| Light of the Great Prism | Class Item | 1st (Conflux) |
Destiny 2 Vault of Glass: Warlock armor
| Armor Name | Armor Type | Encounter |
| Facade of the Hezen Lords | Helmet | 4th (Gatekeepers), 5th (Atheon) |
| Gloves of the Hezen Lords | Arms | 1st (Conflux), 2nd (Oracles), 3rd (Templar) |
| Cuirass of the Hezen Lords | Chest | 3rd (Templar), 5th (Atheon) |
| Tread of the Hezen Lords | Legs | 2nd (Oracles), 4th (Gatekeepers) |
| Fragment of the Prime | Class Item | 1st (Conflux) |
Destiny 2 Vault of Glass: Hunter armor
| Armor Name | Armor Type | Encounter |
| Prime Zealot Helm | Helmet | 4th (Gatekeepers), 5th (Atheon) |
| Prime Zealot Gloves | Arms | 1st (Conflux), 2nd (Oracles), 3rd (Templar) |
| Prime Zealot Cuirass | Chest | 3rd (Templar), 5th (Atheon) |
| Prime Zealot Greaves | Legs | 2nd (Oracles), 4th (Gatekeepers) |
| Shattered Vault Cloak | Class Item | 1st (Conflux) |
Destiny 2 Vault of Glass: Armor mods
| Armor Mod | Effect |
| Anti-Oracle | Defeating an Oracle grants you Super energy |
| Anti-Praetorian | Defeating a Praetorian grants you Super energy |
| Rapid Oracle Disruptor | Your equipped pulse rifles, shotguns, sidearms, submachine guns, and swords deal additional damage to Oracles |
| Vex Breaker | Defeating a Vex with a melee attack has a chance to spawn an Orb of Power. Multiple copies of this mod increase the Super energy granted when those Orbs are picked up |
| Superstructure Striker | While you are standing on a Sync Plate or are near a Conflux, weapon attacks that hit powerful Vex combatants have a high chance to stun those combatants |
| Aggressive Oracle Disruptor | Your equipped auto rifles, fusion rifles, grenade launchers, trace rifles, and rocket launchers deal additional damage to Oracles |
| Vex Destroyer | Defeating a Vex with a grenade attack has a chance to spawn an Orb of Power. Multiple copies of this mod increase the Super energy granted when those orbs are picked up |
| Superstructure Medic | While you are standing on a Sync Plate, or are near a Conflux, weapon attacks that hit powerful Vex combatants have a high chance to create a burst of healing for you and nearby allies |
| Precise Oracle Disruptor | Your equipped bows, hand cannons, linear fusion rifles, scout rifles, and sniper rifles deal additional damage to Oracles in the Vault of Glass |
| Vex Striker | Defeating a Vex with a precision hit has a chance to spawn an Orb of Power. Multiple copies of this mod increase the Super energy granted when those Orbs are picked up |
| Superstructure Defender | While you are standing on a Sync Plate or are near a Conflux, weapon attacks that hit powerful Vex combatants have a high chance to weaken those combatants |