Where to find Smithing Stones in Elden Ring & how to use them
 From Software
Smithing Stones are crucial for upgrading your weapons and armor in Elden Ring. Here’s where to find some as you’re first starting out, and later on down the line.
If you want to upgrade your weapons and shields in Elden Ring, you’ll need Smithing Stones. These upgrade materials come in levels from 1-9, with each tier giving a bigger buff.
There are a variety of places to find each level of Smithing Stone too. Here, we’ll go over the upgrade provided by each kind, and some places to find them.
 From Software
What are Smithing Stones in Elden Ring?
Like we mentioned above, there are nine different levels of Smithing Stone, each allowing you a progressively larger level of improvement on gear.
The different levels of stone are listed below, along with the maximum amount they can upgrade weapons and shields.
| Name | Effect |
| Smithing Stone 1 | Upgrades max of +3 |
| Smithing Stone 2 | Upgrades max of +6 |
| Smithing Stone 3 | Upgrades max of +9 |
| Smithing Stone 4 | Upgrades max of +12 |
| Smithing Stone 5 | Upgrades max of +15 |
| Smithing Stone 6 | Upgrades max of +18 |
| Smithing Stone 7 | Upgrades max of +21 |
| Smithing Stone 8 | Upgrades max of +24 |
| Smithing Stone 9 | Upgrades max of +25 |
Where to find Smithing Stones in Elden Ring
 From Software
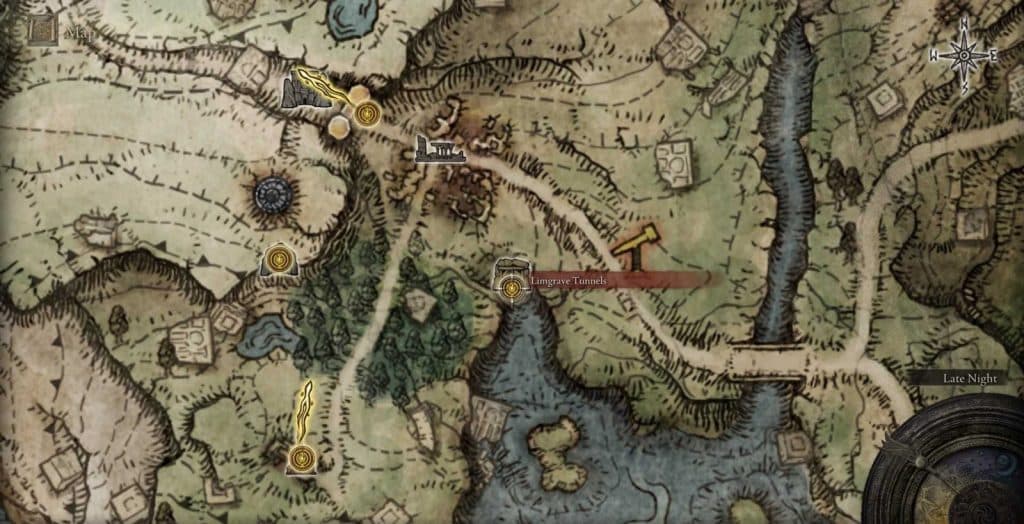
If you’re just starting out in Elden Ring, the Limgrave Tunnels are a great place to find Smithing Stones. There is a boss there, but it’s not necessary to kill them to acquire the stones.
Instead, you just want to keep an eye out for gold areas that appear on the wall and interact with them. This will net you several Smithing Stones, and make eventually fighting the boss a little less tough.
As you progress you’ll be able to buy Smithing Stones 1 and 2 directly from Roundtable Hold. You can accomplish this as follows:
- Go to the Raya Lucaria Crystal Tunnel.
- Locate The Crystalian.
- Kill The Crystalian.
- After being downed they’ll drop the Smithing Stone Miner’s Bell Bearing.
- Return to Roundtable Hold and give the Bell Bearing to the Twin Maiden Husks.
- You’re now able to buy Smithing Stones 1 and 2 for the rest of the game.
More and more powerful Smithing Stones can be looted from hidden corpses, and dropped from enemies and bosses as you progress through Elden Ring’s various areas.
How to use Smithing Stones in Elden Ring
 From Software
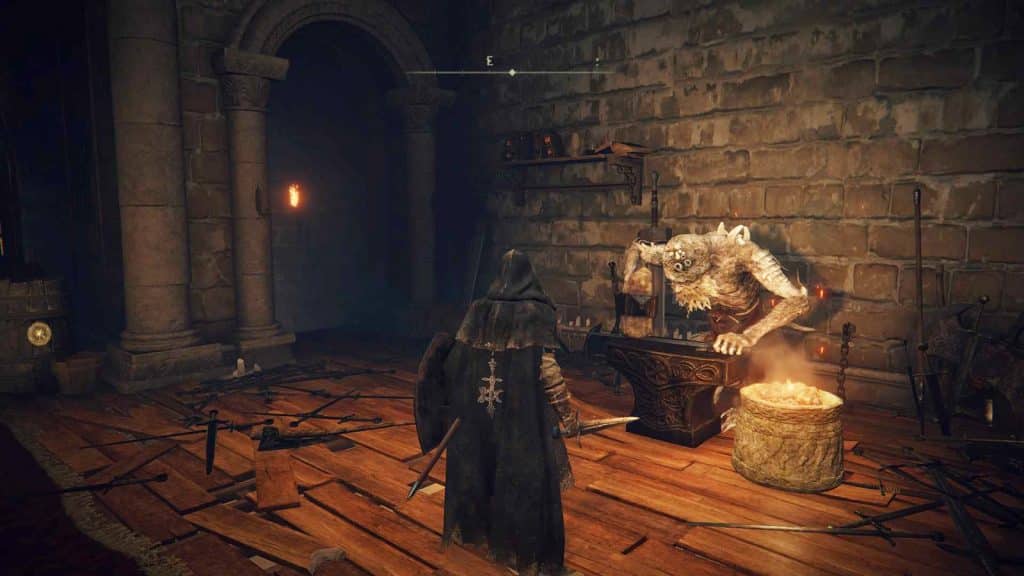
Finally, once you have your Stones, you’ll want to upgrade your items. Up to level +3 this can be done at an anvil with Runes. Beyond that though, you’ll need to find a Blacksmith.
The easiest one to find is Smithing Master Hewg who, like the Twin Maiden Husks, resides in Roundtable Hold. With him, you can upgrade items all the way to +25. That is, of course, if you have the Smithing Stones and Runes to do so.
So, there you have it, all the tips and tricks you need to beat the Flying Dragon Agheel in Elden Ring. Make sure you check out our Elden Ring page for all the latest news and guides.
Elden Ring Stonedigger Troll | Elden Ring Margit the Fell Omen | Elden Ring Tree Sentinel | Elden Ring Grave Warden | Elden Ring Pumpkin Head | Elden Ring Soldier of Godrick | Elden Ring Godrick the Grafted